


Grayscaling Images Made Simple with OpenCV

Jeremy Morgan 
Mar 23, 2023 - 5 min read
Last Update: Apr 4, 2023

AI changed software development. This is how the pros use it.
Written for working developers, Coding with AI goes beyond hype to show how AI fits into real production workflows. Learn how to integrate AI into Python projects, avoid hallucinations, refactor safely, generate tests and docs, and reclaim hours of development time—using techniques tested in real-world projects.
Welcome, friends, to another tutorial about Computer Vision and OpenCV. How do you grayscale images? If you are dipping your toes into computer vision, this tutorial will make grayscaling fun and easy. Let’s explore several ways to grayscale images using OpenCV and Python.
If you want to go straight to the code click here
Grayscaling: The Magic Behind the Monochrome
We first need to discuss grayscaling and why it is so essential in computer vision. Grayscaling is the process of converting an image from its colorful form (RGB, CMYK, etc.) into a simple, elegant grayscale representation.
Greyscale images have intensity values ranging from 0 (black) to 255 (white). As a result, algorithms can process and analyze image data more efficiently. Let’s dig deeper into that.
Why is Grayscaling So Important?
Simplicity: Grayscaling simplifies images from multi-channel (RGB) to single-channel representations. This simplification makes it easier for computer vision algorithms to process and analyze images.
Computational Efficiency: Grayscale images require less memory and processing power. Computer vision algorithms can run faster on grayscale images, enabling real-time processing.
Improved Feature Detection: Grayscaling emphasizes structural and textural features in an image, such as edges and contours, which are often more critical for computer vision tasks than color information. Performance in tasks like object detection, recognition, and tracking can be improved.
Robustness to Lighting Variations: In computer vision applications, grayscale images are less affected by changes in lighting conditions. Rather than focusing on color, algorithms focus on intensity values.
Standardization: With grayscaling, images of different color spaces are represented consistently, enabling computer vision algorithms to work with various input data without requiring additional preprocessing.
Compatibility with Classical Algorithms: Many classical computer vision algorithms, such as Canny edge detection and Hough transforms, were explicitly designed for grayscale images. Grayscale ensures compatibility with these techniques.
Preprocessing for Deep Learning: Grayscale images can be used as a preprocessing step for deep learning models, especially when color information is not critical to the task. By reducing input dimensions, the model becomes simpler and more efficient.
The Science of Grayscaling
Now that we’ve covered the basics, let’s explore grayscaling’s underlying theory. The human eye perceives color through three primary channels: red, green, and blue (RGB). The human brain is highly skilled at processing these channels.
However, computer vision algorithms aren’t as smart as your brain. That’s where grayscaling comes in. By converting an image to grayscale, we’re telling the computer: “Hey, don’t worry about all those colors. Just focus on the intensity of the light.” It makes it simple.
We combine the three RGB channels into a single channel to convert an image to grayscale. To accomplish this, a weighted average is calculated taking into account each color’s sensitivity in the human eye. The formula is:
gray_value = 0.2989 * R + 0.5870 * G + 0.1140 * B
Interesting right? That’s how we come up with grayscale images.
OpenCV and Python: A Powerful Duo
OpenCV is an open-source computer vision library that provides a wide range of tools and techniques for image processing, including grayscaling. It’s awesome, and I love working with it. It’s saved me a lot of time on projects, and I’m just now getting into the more complex features. It’s amazing.
Combined with Python, a versatile and beginner-friendly programming language, OpenCV becomes a powerful tool for computer vision tasks.
Let's Get Grayscaling!
Ok, enough theory. Let’s get started.
I will start with this image:
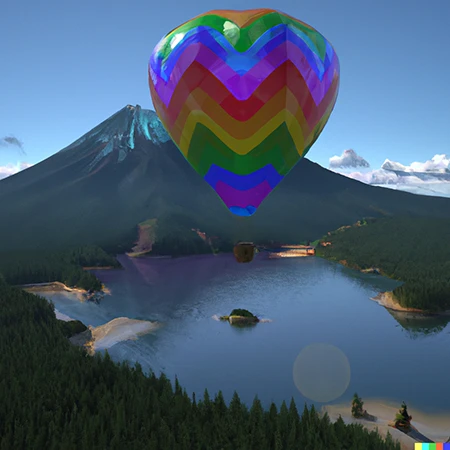
You can use it too. Download the PNG here
To start grayscaling in OpenCV and Python, we first need to install the OpenCV library. You can do this by running the following command in your terminal or command prompt:
pip install opencv-python
Then we need to import the OpenCV library into our python script.
import cv2
Next, we need to read the image. This is a process you’ll see repeated many times in my tutorials. It’s one of the crucial first steps.
image = cv2.imread('example.jpg')
With the image loaded, we can convert it to grayscale using OpenCV’s cvtColor() function:
gray_image = cv2.cvtColor(image, cv2.COLOR_BGR2GRAY)
Just for fun, let’s display the original and grayscale images side by side:
cv2.imshow('Original Image', image)
cv2.imshow('Grayscale Image', gray_image)
Next we’ll wait for a key press (don’t close the window with the x key, it will lock up your terminal) to close the window.
cv2.waitKey(0)
cv2.destroyAllWindows()
So let’s run it!
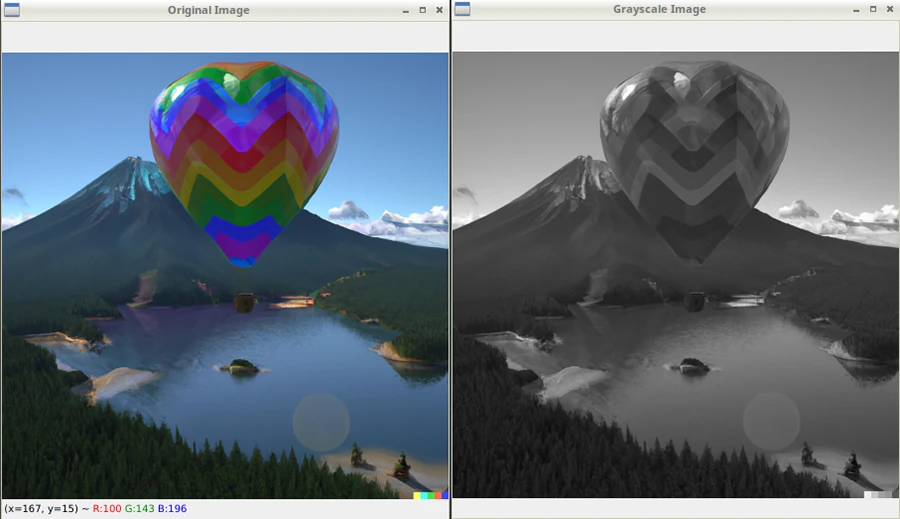
And there you have it! You’ve successfully grayscaled an image using OpenCV and Python.
Key Takeaways
Grayscaling converts a colorful image into a monochrome representation by assigning each pixel a single intensity value.
The underlying theory involves calculating a weighted average of the three RGB channels to account for the human eye’s sensitivity to each color.
OpenCV and Python provide a powerful and accessible platform for grayscaling images and other computer vision tasks.
The cvtColor() function in OpenCV enables easy conversion of images to grayscale.
So that’s all there is to it! Now you can grayscale images with OpenCV and Python. This is just the beginning! It’s an essential skill that will open the door to many more exciting applications like edge detection and object recognition.
Happy coding, and see you in the next tutorial.
- Jeremy
I have many OpenCV Demos on GitHub you can download and run. I build them on my Computer Vision live streamQuestions, comments? Yell at me!

Skip the hype. The newsletter that keeps you in the know.
AI news curated for engineers. The AI New Hotness Newsletter is what you need.
Zero fluff. Just the research, tools, and infra updates that actually affect your production stack.
Stay up to date on AI for developers - Subscribe on LinkedIn
