


Build Your Own Bedrock Empire: The Ultimate Minecraft Server Guide

Jeremy Morgan 
Apr 27, 2025 - 12 min read
Last Update: Apr 27, 2025

AI changed software development. This is how the pros use it.
Written for working developers, Coding with AI goes beyond hype to show how AI fits into real production workflows. Learn how to integrate AI into Python projects, avoid hallucinations, refactor safely, generate tests and docs, and reclaim hours of development time—using techniques tested in real-world projects.
Do you want to rule your own Minecraft world without lag or the restrictions of Realms?
I love Minecraft. I started playing it with my kids and got hooked. As we all know, playing it with friends is exponentially more fun than just running it on your laptop.
For less than the price of a large pizza each month, you can create a solid Minecraft Bedrock server. It’s available 24/7 for you and your friends. Say goodbye to “who’s hosting tonight?” texts. No more world progress stuck on someone else’s computer. Just pure, uninterrupted block-building fun that you control.
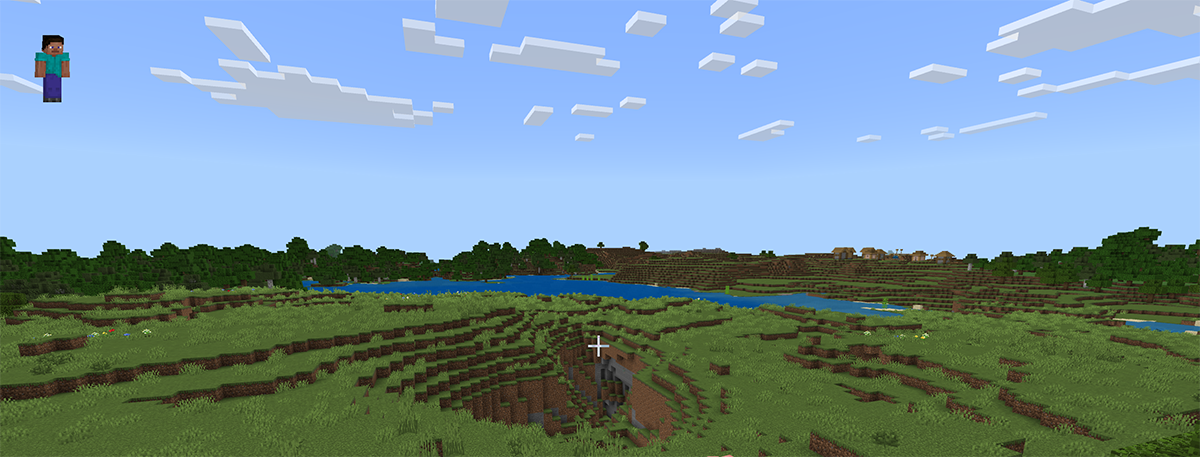
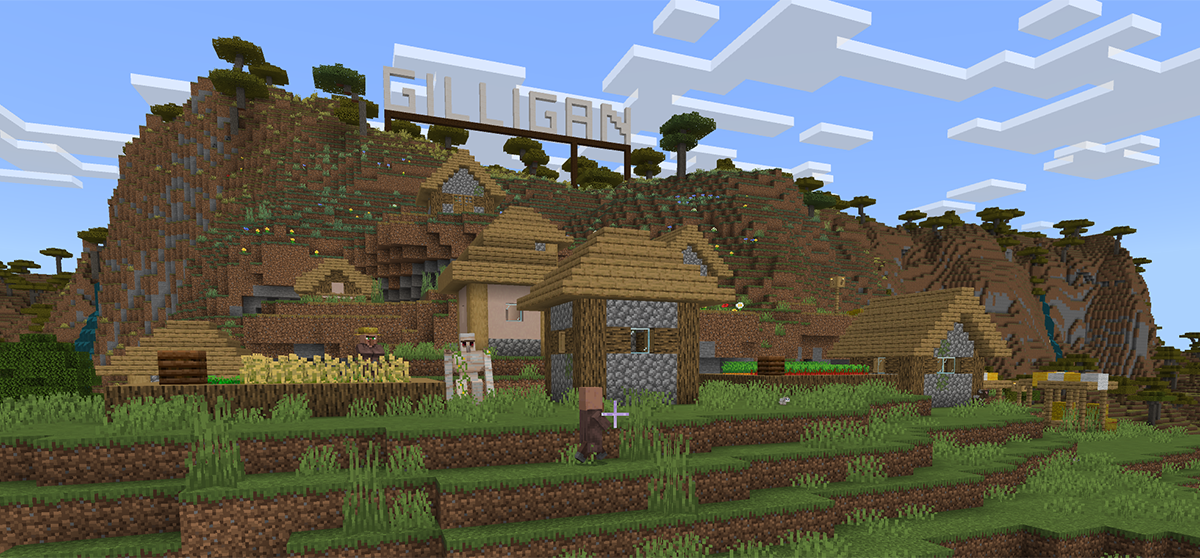 Screenshot of Minecraft.JeremyMorgan.com. Join me!
We’re using the Bedrock edition of Minecraft, which is the version for Windows, consoles, and mobile devices so no matter what your friends are using you can play together.
This guide will help you set up a solid Minecraft server. It will run 24/7. It will back itself up while you sleep. And most importantly, you have powerful admin controls over your realm. And the best part? You don’t need to be a Linux expert to start.
Grab your pickaxe! We’re about to mine through the technical details and build something amazing together.
I’m going to set this up on Hostinger, because it’s a great service and it’s the most affordable way I know of to get a server up and running. You can also use AWS Lightsail, Digital Ocean, or any other VPS provider you like.
If you use this link you can save a lot of money using the code JEREMY at checkout.
Let’s walk through the clean way to set up a Bedrock server on Ubuntu:
1. Launch an Ubuntu Instance
- Create a Hostinger VPS server with Ubuntu 24.04 LTS (recommended).
Let’s go into the VPS section of the Hostinger control panel and create a new VPS.

Choose your location (closest to you, or your players).

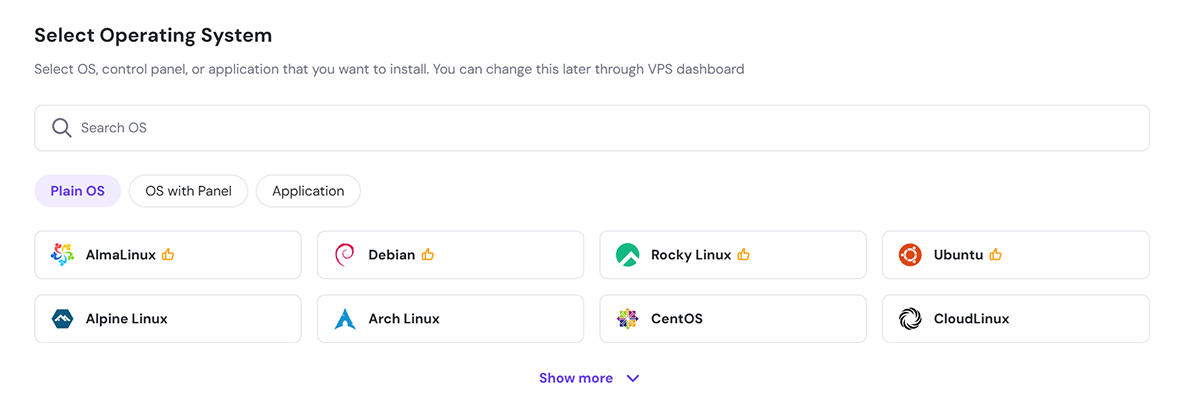
And next choose your Operating System. I chose Ubuntu 24.04 LTS.
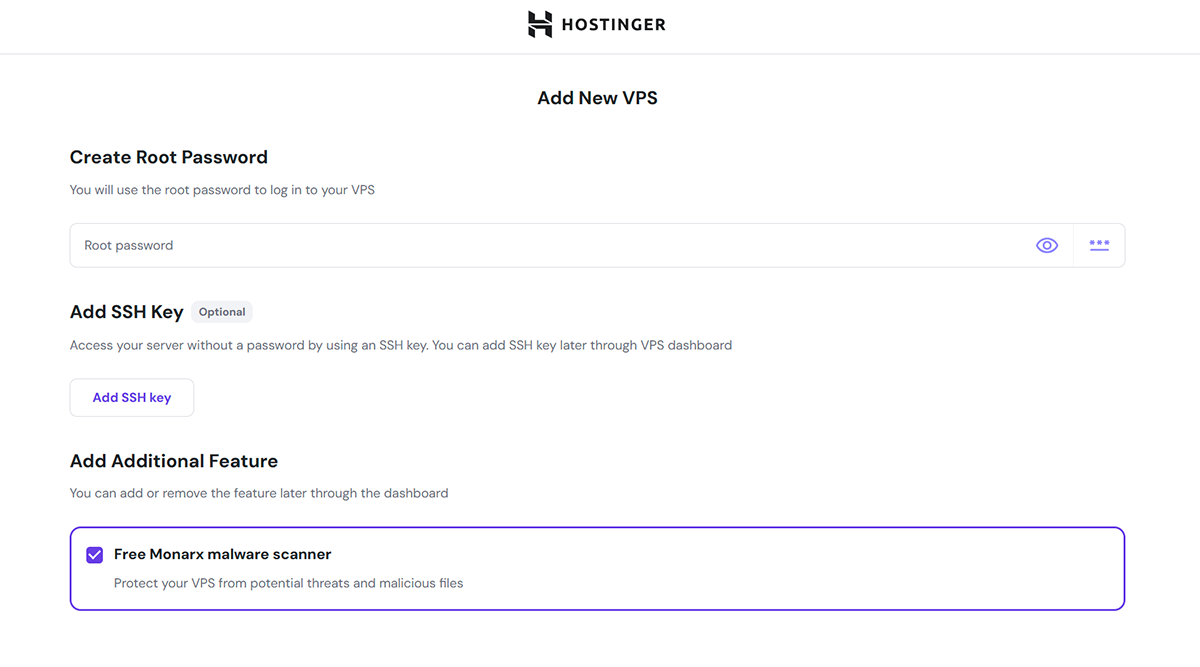
Next, set up a root password. This is the password you will use to SSH into your server, or use an SSH key. I recommend using an SSH key.
Now we can choose the plan. For a Minecraft server, you want to choose a plan that has at least 2GB of RAM.
- Choose a plan with 2 vCPUs (or more) for better performance.
- Pick at least 2 GB RAM (small instance is usually enough for 5-10 players).

Once created, you can SSH into your server using the IP address and the password you set up. If you used an SSH key, you can use that to SSH into your server.
ssh -i /path/to/your/private/key username@<your-instance-ip>
2. Update the System
SSH into your instance and update packages:
sudo apt update && sudo apt upgrade -y
Install a few useful tools:
sudo apt install wget unzip screen -y
3. Create a Directory for Minecraft
Organize things nicely:
mkdir ~/bedrock-server
cd ~/bedrock-server
4. Download the Bedrock Server
Get the latest Bedrock server from Minecraft.net. So, this will be difficult, because they don’t allow you to directly download it with wget. You can go to Minecraft Bedrock Server Download page in your browserYou must accept the EULA first.

So what I did was just download the archive to my laptop, then use scp to copy it over to the server.
scp -i /Keys/minecraftserver.pem ~/Downloads/bedrock-server-*.zip ubuntu@<your-instance-ip>:~/
Whether you’re in Windows, Mac, or Linux, you can use the scp command to copy files over SSH. Just replace <your-instance-ip> with your actual instance’s IP address.
Then SSH into your instance and unzip it:
unzip [name of zip file].zip -d ~/bedrock-server
chmod +x ~/bedrock-server/bedrock_server
5. Open Firewall Ports
Allow Minecraft Bedrock network traffic. Make sure not to block out your own SSH connection as well.
Open UDP 19132 (default Bedrock port), as well as TCP 22 (SSH):
sudo ufw allow 22/tcp
sudo ufw allow 19132/udp
sudo ufw enable
(If UFW isn’t installed, do sudo apt install ufw first.)
In your KVM Firewall Configuration too:
- Add a UDP rule, port 19132, open to Anywhere (0.0.0.0/0).
- Add a TCP rule, port 22, open to Anywhere (0.0.0.0/0).
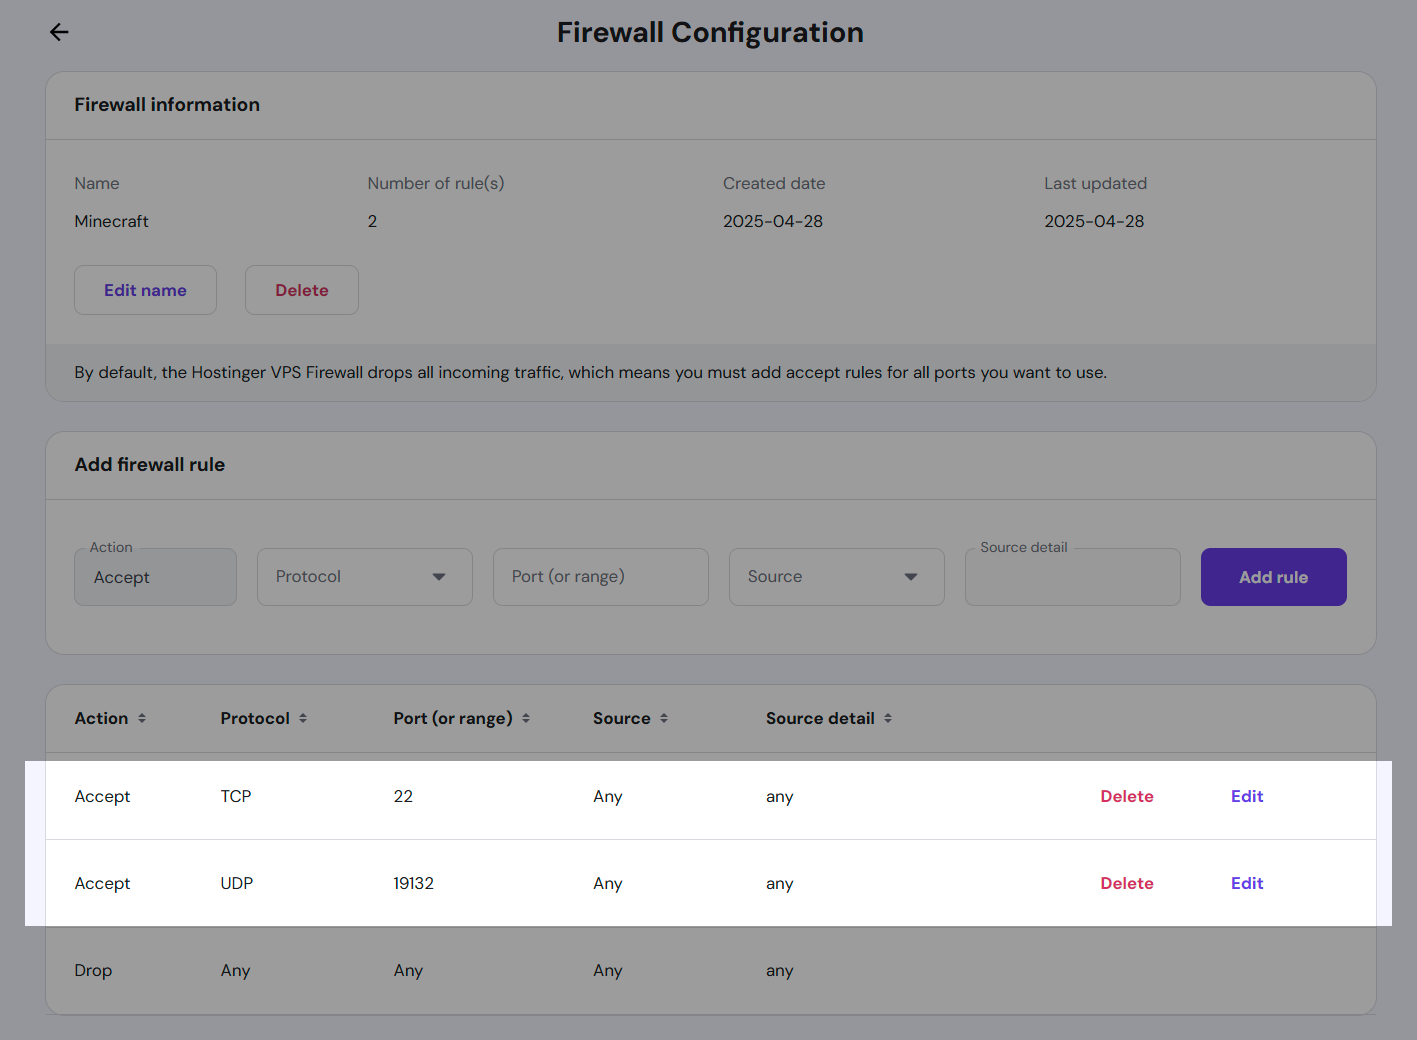
✅ (If you forget this step, players can’t connect!)
6. Configure Server Settings (Optional)
You can tweak the server settings:
vim ~/bedrock-server/server.properties
This will give you a big text file with a bunch of settings you can change. It’s great.

Change things like:
server-name=My Awesome Bedrock Server
gamemode=survival
difficulty=normal
allow-cheats=true
max-players=10
allow-flights=true
Make the changes you want, then save and exit.
Notice the setting for “level-seed” is set to blank. This means that the world will be generated with the default seed. If you want to use a custom seed, you can change it here. A seed is a string of numbers that Minecraft uses to generate the world. You can find a list of popular seeds online, or you can use a random seed generator to create one.
7. Run the Server
Start the server inside a screen session (so it keeps running after you disconnect):
screen -S bedrock
Then start Minecraft:
./bedrock_server
You should see output like:
Server started.
Listening on 0.0.0.0:19132
Detach from screen:
Press Ctrl+A, then D
Reconnect to the server session:
screen -r bedrock
🧠 Bonus Tip: Make It Auto-Start
To make the server start automatically on boot, you can create a systemd service file. This way you don’t have to manually start it every time, and it will restart if the server crashes.
The right way to do that on Ubuntu is to create a systemd service.
🛠️ Systemd Service for Bedrock Server
1. Create a Systemd Service File
First, make a new service definition:
sudo vim /etc/systemd/system/bedrock.service
Paste this into the file:
[Unit]
Description=Minecraft Bedrock Server
After=network.target

[Service]
WorkingDirectory=/home/ubuntu/bedrock-server
ExecStart=/home/ubuntu/bedrock-server/bedrock_server
Restart=on-failure
RestartSec=5
User=ubuntu
Nice=1

[Install]
WantedBy=multi-user.target
🧠 Breakdown of what this does:
| Part | Meaning |
|---|---|
After=network.target | Waits for network to be ready |
WorkingDirectory | The folder where your server files are |
ExecStart | Command to start the Bedrock server |
Restart=on-failure | Auto-restart if it crashes |
RestartSec=5 | Wait 5 seconds before restarting |
User=ubuntu | Runs under your Ubuntu user (adjust if needed) |
Nice=1 | Slightly lower CPU priority to avoid starving system processes |
2. Enable and Start the Service
Reload systemd to recognize the new service:
sudo systemctl daemon-reload
Enable it to start on boot:
sudo systemctl enable bedrock
Start the service:
sudo systemctl start bedrock
3. Check Server Status
To check if it’s running:
sudo systemctl status bedrock
You should see something like:
● bedrock.service - Minecraft Bedrock Server
     Loaded: loaded (/etc/systemd/system/bedrock.service; enabled; vendor preset: enabled)
     Active: active (running) since...
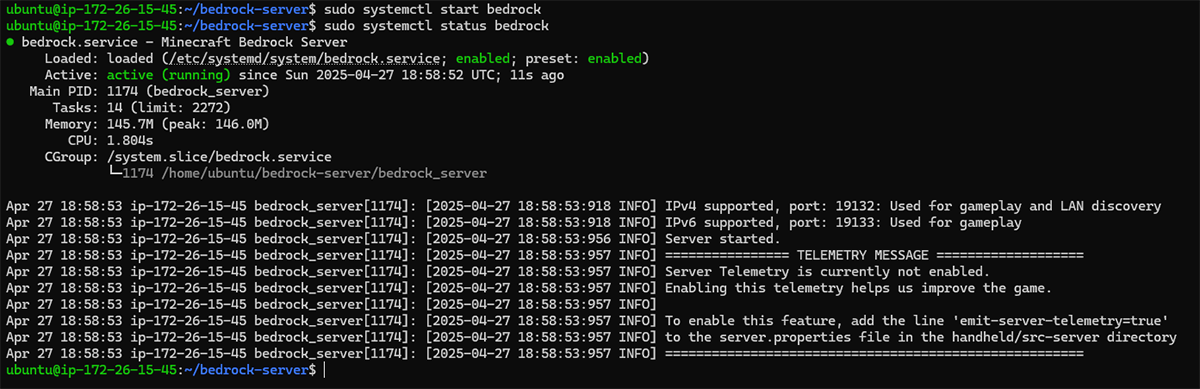
If it ever crashes, systemd will automatically restart it within 5 seconds.
If you reboot the server — the Minecraft server starts up automatically.
🧹 Bonus Tip: Log Output
If you want to see the server’s logs at any time:
journalctl -u bedrock -f
(-f means “follow” like tail -f)
🎯 Full Quick Summary:
| Command | Purpose |
|---|---|
sudo nano /etc/systemd/system/bedrock.service | Create service file |
sudo systemctl daemon-reload | Reload services |
sudo systemctl enable bedrock | Auto-start at boot |
sudo systemctl start bedrock | Start server now |
sudo systemctl status bedrock | Check if running |
journalctl -u bedrock -f | Live server logs |
⚡ Another Pro Tip:
If your server updates in the future (new Bedrock version),
all you need to do is:
sudo systemctl stop bedrock
# update server files
sudo systemctl start bedrock
No redoing the service file needed!
⚡ Yet Another Pro Tip: Automatic Backups
Automatic backups are the best thing you can do to protect your Minecraft world (and avoid those “I lost everything!” disasters 😱).
Let’s set it up:
1. Create a Backup Script
First, we need to install zip (if not already installed):
sudo apt install zip -y
Then, let’s create a backup script file:
vim ~/bedrock-server/backup_world.sh
Paste this into it:
#!/bin/bash

# === Settings ===
WORLD_DIR="/home/ubuntu/bedrock-server/worlds"
BACKUP_DIR="/home/ubuntu/bedrock-server/backups"
TIMESTAMP=$(date +"%Y-%m-%d_%H-%M-%S")
BACKUP_FILE="$BACKUP_DIR/world_backup_$TIMESTAMP.zip"

# === Make sure backup directory exists ===
mkdir -p "$BACKUP_DIR"

# === Backup the world folder ===
zip -r "$BACKUP_FILE" "$WORLD_DIR"

# === Optional: Delete old backups (keep only last 7 backups) ===
ls -tp "$BACKUP_DIR" | grep -v '/$' | tail -n +8 | xargs -I {} rm -- "$BACKUP_DIR/{}"
2. Make the Script Executable
chmod +x ~/bedrock-server/backup_world.sh
✅ Now you have a simple working backup tool!
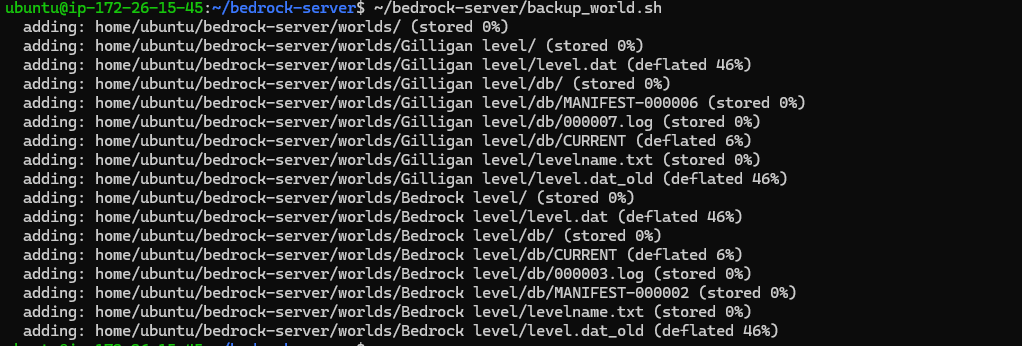
3. Test the Script
Run it manually once:
~/bedrock-server/backup_world.sh
It should:
- Create a
backups/folder inside yourbedrock-server/ - Zip your
worlds/folder into a file likeworld_backup_2025-04-27_19-42-00.zip
4. Automate It with Cron
Edit your crontab:
crontab -e
At the bottom, add this line to run it once every day at 2 AM:
0 2 * * * /home/ubuntu/bedrock-server/backup_world.sh
✅ This means:
- Minute:
0 - Hour:
2(2:00 AM server time) - Every day, every month, every day of week
🎯 Quick Recap:
| Step | Command |
|---|---|
| Create script | nano ~/bedrock-server/backup_world.sh |
| Make executable | chmod +x ~/bedrock-server/backup_world.sh |
| Test backup | ~/bedrock-server/backup_world.sh |
| Schedule with cron | crontab -e and add 0 2 * * * /home/ubuntu/bedrock-server/backup_world.sh |
📦 Bonus: About the backup system
- Each backup is timestamped (easy to restore specific days)
- Only the last 7 backups are kept (saves disk space)
- Stored inside
/home/ubuntu/bedrock-server/backups/
If your server ever crashes, you can just unzip one backup and restore it instantly!
🚀 The Final Test
Now, you can connect to your server using the Bedrock client on your computer or console.
- Open Minecraft Bedrock Edition
- Add a new server
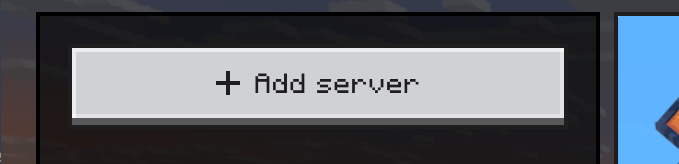
- Enter the server IP address and port number

- Click “Join Server”
- You should be able to connect and play!
🛠️ Make yourself an Op (Admin) of the server
Now that it’s up and running, let’s make you an admin/operator on your Minecraft Bedrock server so you have full control. 🚀
In Bedrock servers, admins are called “operators” (ops), and you control it through the permissions.json file.
Here’s exactly how to do it:
1. Find Your Xbox Gamertag
You need your Xbox Live Gamertag exactly as it appears (case-sensitive).
Example:
- If your Xbox name is
CoolGamer42, that’s what you use. - If it has spaces or capitalization, match it exactly:
Cool Gamer 42
2. Edit permissions.json
Go to your server folder:
cd ~/bedrock-server
Edit the permissions.json file:
vim permissions.json
If the file is empty or only has [], you’ll add your user manually.
Example permissions.json file:
[
    {
        "permission": "operator",
        "xuid": "1234567890123456"
    }
]
BUT WAIT: You need your XUID, not just your gamertag.
3. Get Your Xbox XUID
You need to convert your Gamertag → XUID (Xbox Unique ID).
You can do this easily:
- Go to a site like https://cxkes.me/xbox/xuid
(or Google “Xbox XUID Converter”) - Enter your Gamertag
- Copy the XUID number (it’s a long number, like
2814728976823923).
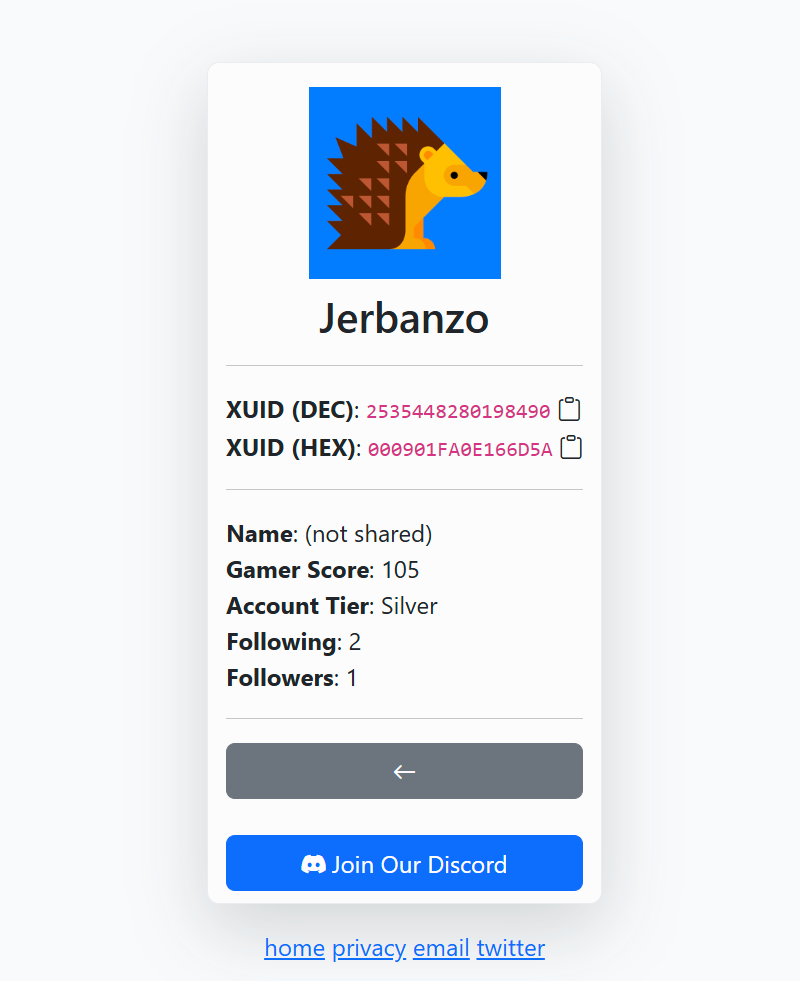
✅ This XUID is what the Bedrock server uses to identify players, not the visible Gamertag.
4. Save and Restart the Server
After updating permissions.json, save and exit (Ctrl+O, Enter, Ctrl+X).
Then restart your server:
sudo systemctl restart bedrock
✅ When you log in next time, you’ll have admin permissions —
you can use commands like /gamemode, /give, /tp, etc.
📋 Full Example: permissions.json
If your XUID is 2814728976823923, your permissions.json would look like:
[
    {
        "permission": "operator",
        "xuid": "2814728976823923"
    }
]
If you have multiple admins, just add more:
[
    {
        "permission": "operator",
        "xuid": "2814728976823923"
    },
    {
        "permission": "operator",
        "xuid": "2814728976823924"
    }
]
🧠 Bonus Tip: In-Game Commands (After You Are Admin)
Once you are operator, you can also promote others in-game:
/op <playername>
or demote:
/deop <playername>
(But you yourself must already be an operator to run /op.)
🚀 Quick Recap:
| Step | Command |
|---|---|
| Find your Xbox Gamertag | Case-sensitive |
| Get XUID | Use an online XUID converter |
Edit permissions.json | Add your XUID with "operator" |
| Restart the server | sudo systemctl restart bedrock |
⚡ Fast Troubleshooting
If after all this you’re not operator when you join:
- Double-check the XUID is correct
- Check for any typo in the JSON format (missing comma, extra bracket)
- Make sure you restarted the server after editing
- Confirm you’re logging in with the same Xbox account that matches the XUID
Awesome — let’s get you loaded up with ready-to-copy admin commands you can use the second you’re an operator! 🎮⚡
Here’s a cheat sheet you can save:
🛠 Minecraft Bedrock Server Admin Commands Cheat Sheet
🌎 World Control
| Command | What it Does |
|---|---|
/time set day | Set time to daytime |
/time set night | Set time to night |
/weather clear | Stop rain/thunder |
/weather rain | Make it rain |
/gamerule doDaylightCycle false | Freeze time (stops day/night cycle) |
/gamerule keepInventory true | Players keep items after death |
🧍 Player Control
| Command | What it Does |
|---|---|
/gamemode survival <yourname> | Set your gamemode to Survival |
/gamemode creative <yourname> | Set your gamemode to Creative |
/gamemode adventure <yourname> | Set Adventure mode |
/teleport <yourname> <targetplayer> | Teleport to another player |
/give <yourname> diamond_sword 1 | Give yourself a Diamond Sword |
/give <yourname> cooked_beef 64 | Give yourself 64 cooked steaks |
Example:
/gamemode creative Jeremy123
/give Jeremy123 diamond_pickaxe 1
🛡️ Server/Player Admin Tools
| Command | What it Does |
|---|---|
/op <playername> | Give another player operator (admin) rights |
/deop <playername> | Remove operator status |
/kick <playername> | Kick a player from server |
/ban <playername> | Ban a player |
/pardon <playername> | Unban a player |
Example:
/op CoolFriend
/kick Troll123
/ban Griefer321
📋 Special Notes:
- You must type your Xbox Gamertag exactly (including spaces/caps).
/giveuses item IDs — most are obvious (diamond_pickaxe,iron_sword,bread).- You can find full item IDs here if needed.
🎯 Quick Power Combo to Set Up a Nice Spawn Area:
Freeze the day-night cycle:
/time set day
/gamerule doDaylightCycle false
Clear weather forever:
/weather clearTurn on keepInventory (players don’t lose items on death):
/gamerule keepInventory trueSet your gamemode creative to build:
/gamemode creative <yourname>
Boom — you’re now set up to build a cozy spawn village without worrying about mobs or dying. 🏡
🚀 Super Quick Saveable Commands Summary:
/time set day
/weather clear
/gamerule doDaylightCycle false
/gamerule keepInventory true
/gamemode creative <yourname>
/give <yourname> diamond_sword 1
/op <friendname>
Conclusion
Congratulations!
You’ve leveled up from casual player to server overlord. Your own Minecraft Bedrock realm is now live in the cloud, ready for epic adventures with friends.
What you’ve built is more than a game server. It’s a world that runs 24/7, backs itself up, and restarts if it crashes. This isn’t just playing Minecraft; it’s crafting an experience.
The possibilities are endless. You can add mods, invite friends, and build amazing structures that won’t vanish if someone forgets to save. Your $12/month investment gives you something realm subscriptions can’t: total control over your Minecraft universe.
And of course if you’d like to join me on my server, it’s
minecraft.jeremymorgan.com
Have fun, just don’t be a jerk on there. I’ll ban you.
Now go create something legendary—your server is ready.
– Jeremy
Remember if you need a great server check out Hostinger for the best prices and support.

Skip the hype. The newsletter that keeps you in the know.
AI news curated for engineers. The AI New Hotness Newsletter is what you need.
Zero fluff. Just the research, tools, and infra updates that actually affect your production stack.
Stay up to date on AI for developers - Subscribe on LinkedIn