


How to add WiFi to your Arduino

Jeremy Morgan 
Dec 19, 2015 - 5 min read
Last Update: Mar 8, 2023

AI changed software development. This is how the pros use it.
Written for working developers, Coding with AI goes beyond hype to show how AI fits into real production workflows. Learn how to integrate AI into Python projects, avoid hallucinations, refactor safely, generate tests and docs, and reclaim hours of development time—using techniques tested in real-world projects.
If you want to add internet connectivity to an Arduino, you have quite a few options. Since most Arduino models are not bundled with Ethernet or WiFi a market has developed for it, and I decided to try one out and share my thoughts.
For this article I’ll be using the Adafruit CC3000 breakout board found here. For the platform I’m using an Arduino Mega 2560 I received from Newark element14.
Assembling the CC3000
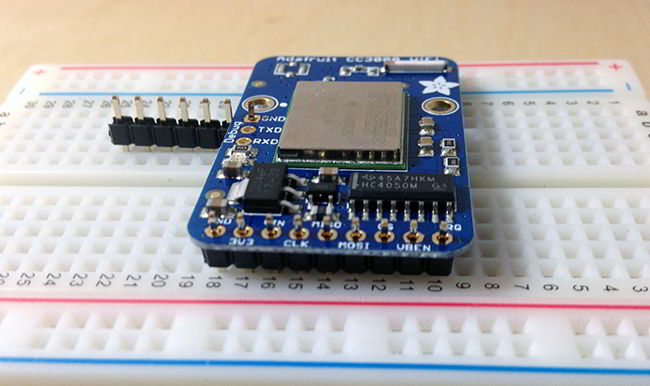
The CC3000 comes shipped with the board and pins like so:

This kit does require soldering, but not a lot. One tip, is to break off the 9 pins as instructed and put them in the a breadboard and place the PCB on top:
This will hold it in place while soldering, when done it should look like this:
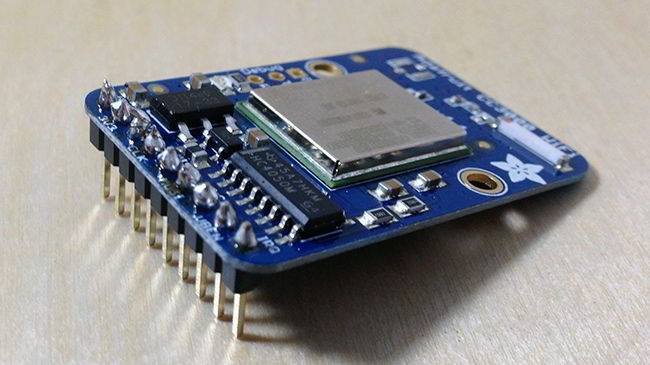
Only I hope your soldering looks better.
Now, put it on the breadboard and wire it up! The wiring instructions are here and in this case it’s wired up for an Arduino Mega.
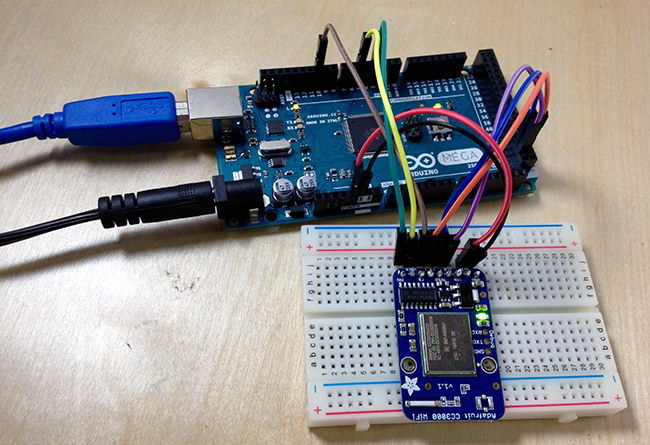
Notice I have an additional power supply coming in. A note from Adafruit:
Make sure your Arduino is powered by a 1 amp or higher rated external power supply when using with the CC3000! Powering an Arduino + CC3000 from a computer/laptop USB port will lead to unstable behavior and lockups because the USB port can’t supply enough power!
This is good advice, and if you don’t have a power supply yet, pick one up. You’ll need it when you start adding things to your Arduino.
Software
Now, we’re going to work on the software part of the project using Arduino Sketch. I’m doing it in Linux, but the instructions will be the same for Windows and OSX as well.
You’ll want to make sure and get the latest Adafruit CC3000 library here for the next steps.
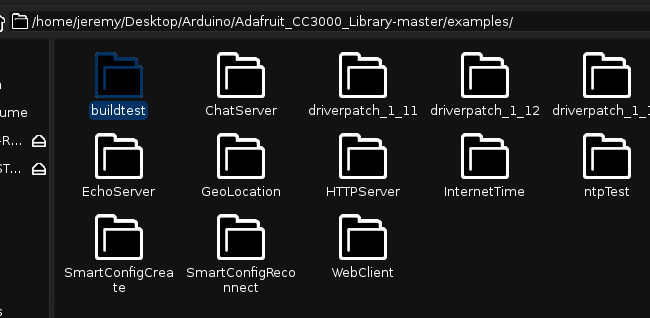
Unzip this file into a folder, we’ll be working with some of the demos included. Do not delete the Zip file.
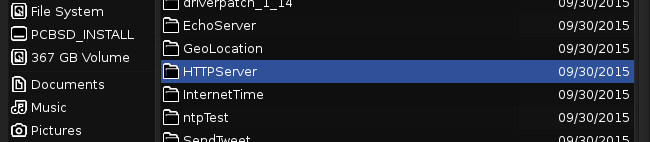
Open up sketch and browse to the folder you just created:
Run the Build Test
We want to run the build test to make sure the device is working correctly. Open up buildtest.ino. You’ll need to change the following to connect to your WiFi network:
#define WLAN_SSID       "myNetwork"
#define WLAN_PASS       "myPassword"
Note if you want to change the security setting for your WAP with the “WLAN_SECURITY” Variable.
Save the sketch. Now you’ll want to import the Adafruit CC3000 library into your sketch. This is generally the fastest way to do it:
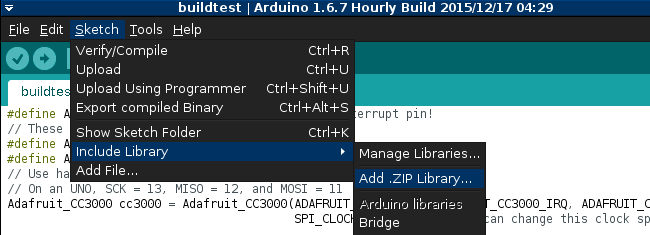
Browse to where you downloaded the zip archive and import it.
Now, try compiling the sketch. You should see this:
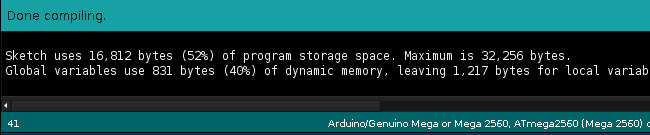
It is now ready to send to the Arduino. Next I’ll show you how to communicate with the Arduino to watch what’s happening.
Monitor the Serial Port
You can compile a sketch and push it to the Arduino and (hopefully) things will happen. The serial monitor is a good way to visually see what’s happening and get feedback from the device. In the Sketch IDE go to Tools -> Serial Monitor.

Note: If you’re using Linux, you may need to add your user account to a group to access this port. Instructions can be found here for how to do that.
Make sure and set the proper baud rate for the CC3000, which is 115200:
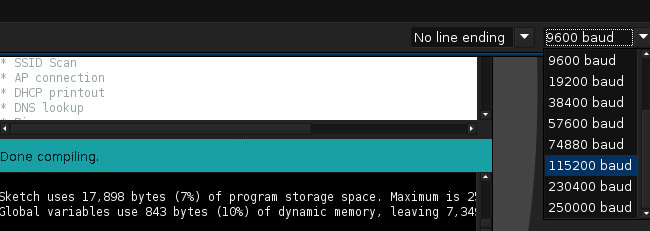
If your WiFi info is correct, you should see:
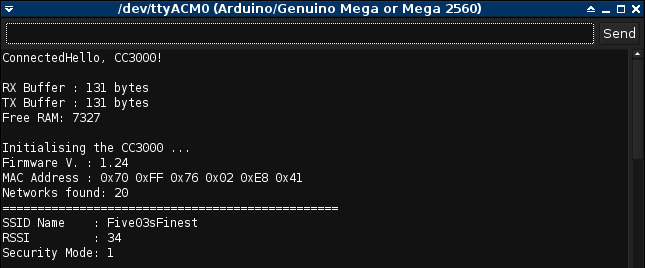
and after it connects it will attempt to ping adafruit. If successful it will look like this:

I’m not sure why but on mine it says it failed to get an IP, then displays it and pings the site. I’ll be looking into that further soon. If all tests pass you’re ready to go.
Build a Web Server
For this project, go back into the examples folder and go into the HTTPServer folder.
Open up HTTPServer.ino in sketch. Like the previous file, you will need to change the WiFi settings:
#define WLAN_SSID       "myNetwork"
#define WLAN_PASS       "myPassword"
Note if you want to change the security setting for your WAP with the “WLAN_SECURITY” Variable.
Verify and upload the sketch.
Open the Serial Monitor again to watch the output of the sketch. If successful, you should see something like this:
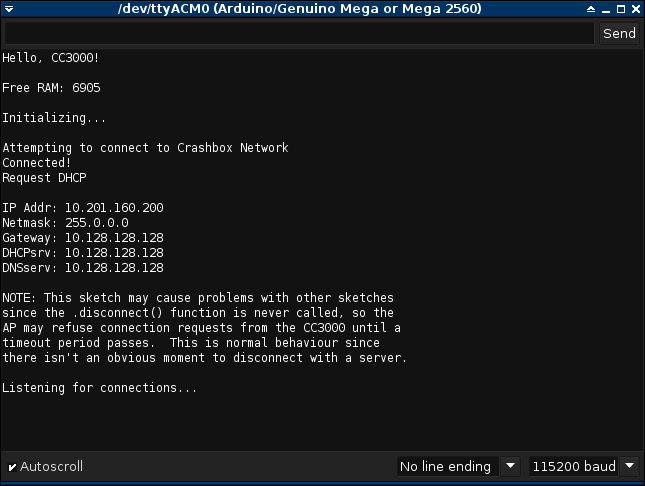
Your server is now listening and ready to go!
Open a web browser and browse to the IP address:
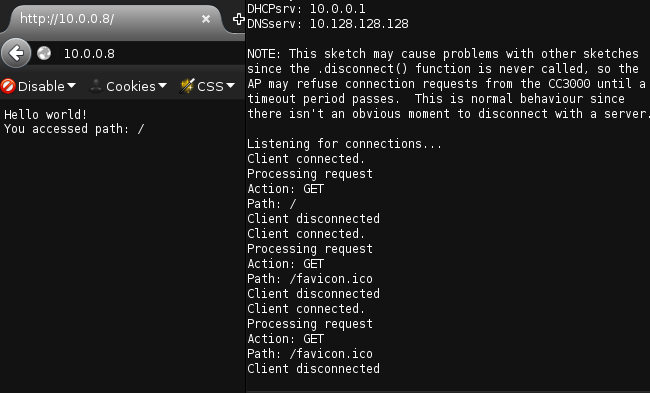
And easy as that you have a web server up. It’s pretty barebones but a good starting point.
Conclusion
I’ve been doing a considerable amount of hacking on the Arduino and the lack of network connectivity hasn’t been that big of a deal. However I know for future projects it will be necessary which is why I decided to purchase this kit and give it a try, and share my results with you.
Overall it was really easy to assemble, only having to solder the pins in. The wiring diagrams are clearly laid out on the Adafruit site, and the software is pretty much written for you. At $34.95 this is an awesome deal for hobbyists wanting an easy way to go Wifi. I opted for the breakout option to see how well it works in case I want to build a product that uses this form factor. I would be curious to see how the shield version stacks up, but I suspect it will be identical.
If you’re looking for a quick, easy way to add WiFi to your Arduino, I recommend the CC3000.
Thanks again to Newark element14 for the Arduino Mega!

Skip the hype. The newsletter that keeps you in the know.
AI news curated for engineers. The AI New Hotness Newsletter is what you need.
Zero fluff. Just the research, tools, and infra updates that actually affect your production stack.
Stay up to date on AI for developers - Subscribe on LinkedIn
