


Shaking down the Raspberry Pi High Quality Camera

Jeremy Morgan 
Jul 9, 2020 - 5 min read
Last Update: Jun 7, 2024

AI changed software development. This is how the pros use it.
Written for working developers, Coding with AI goes beyond hype to show how AI fits into real production workflows. Learn how to integrate AI into Python projects, avoid hallucinations, refactor safely, generate tests and docs, and reclaim hours of development time—using techniques tested in real-world projects.
I picked up the new Raspberry Pi High Quality camera last week. It’s pretty impressive. In this article, I’ll show you some ways to interact with this camera and do some cool stuff with it.
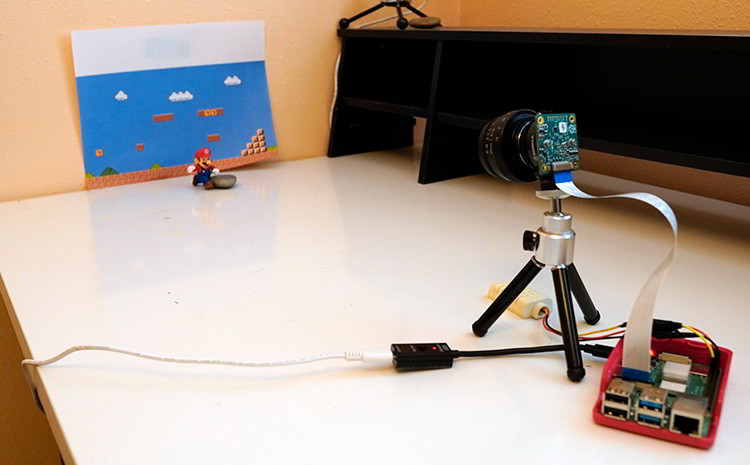
This is my current setup for this article. I built little stage with Mario, and I have the camera with a lens, into my Pi, and a temp/humidity sensor hooked to it. It’s the same I used in my previous live stream with this camera.
In this article, we’ll learn:
- How to set up Raspberry Pi High Quality Camera
- How to configure the camera with V4L2
- Take pictures with Raspistill
- Record video with Raspivid
About the Raspberry Pi HQ Camera
So this camera has some pretty impressive specs for the price.
- Sony IMX477R stacked, back-illuminated sensor, 12.3 megapixels, 7.9 mm sensor - diagonal, 1.55 μm × 1.55 μm pixel size
- Ouput: RAW12/10/8, COMP8
- Back focus: Adjustable (12.5 mm–22.4 mm)
- Lens standards: C-mount, CS-mount (C-CS adapter included)
- IR cut filter: Integrated
- Ribbon cable length: 200 mm
- Tripod mount: 1/4"- 20
It’s a 12MP camera with a decent sensor. Far better than previous Raspberry Pi Cameras.
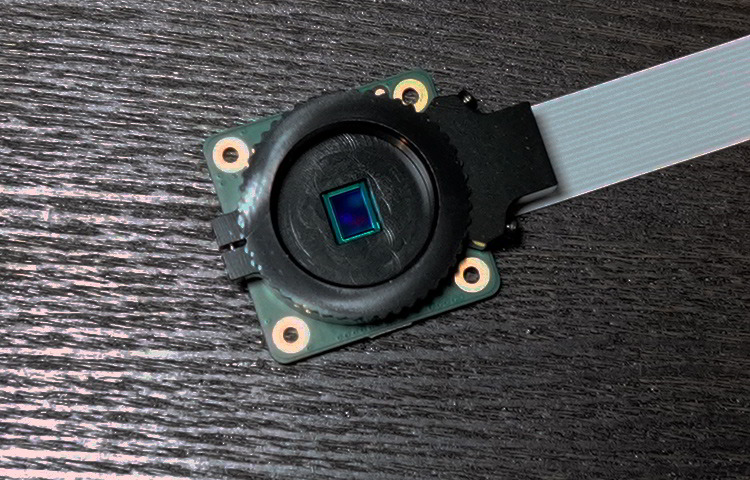
It comes with a ribbon, and a sensor cap out of the box. However you will need to provide a lens for it (C or CS Mount.)
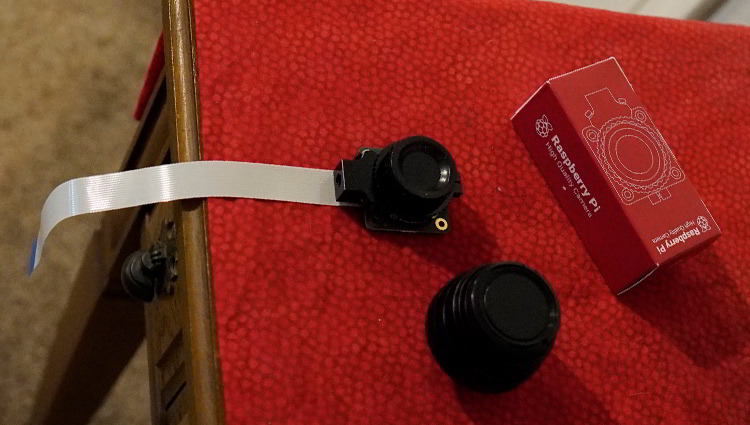
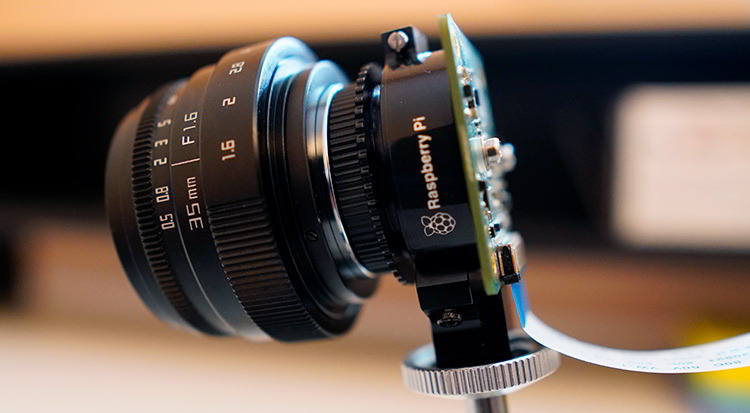
You can get your own HQ Camera here. I chose this 35mm lens for the camera, it’s not too shabby and only 33 dollars. I also had an old cell phone tripod lying around so I mounted the camera to it.
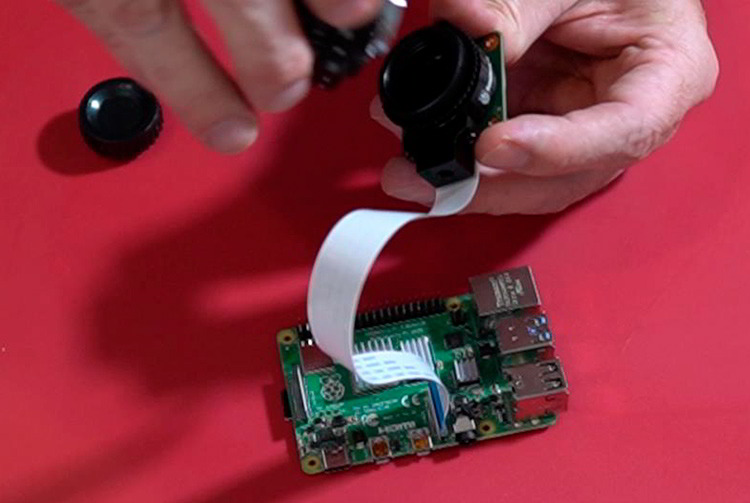
Assembly is pretty straightforward. So enough about the camera, let’s look at how to use it.
Configure the Camera
First, you’ll need to open up your Raspberry Pi Configuration:
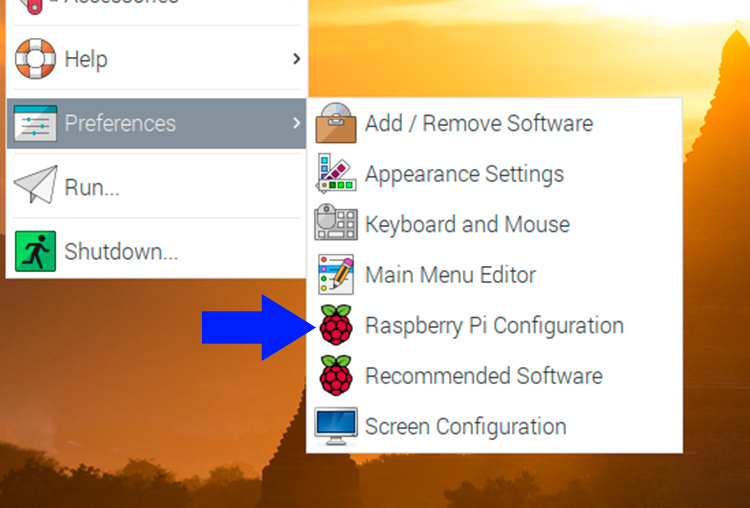
In the configuration, enable “Camera”:
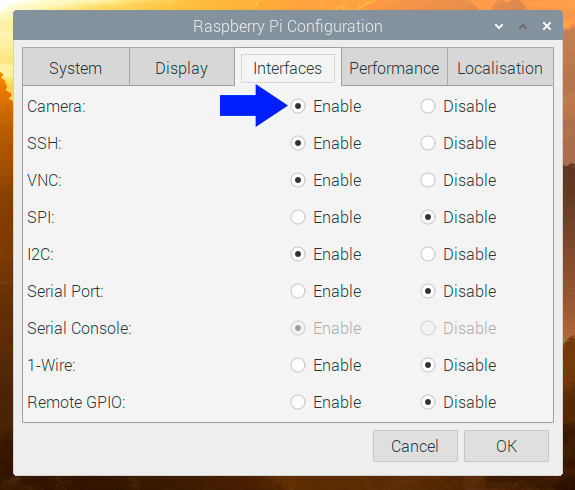
And reboot your Pi.
Dialing in the Camera
If you want to know right away the camera is working, get qv4l2.
This is the V3L2 Test Bench. It will help you get your camera into focus, and you can change various settings.
sudo apt-get install qv4l2
After installing it you’ll need to load this into your kernel:
sudo modprobe bcm2835-qv4l2
Then run the program:
qv4l2
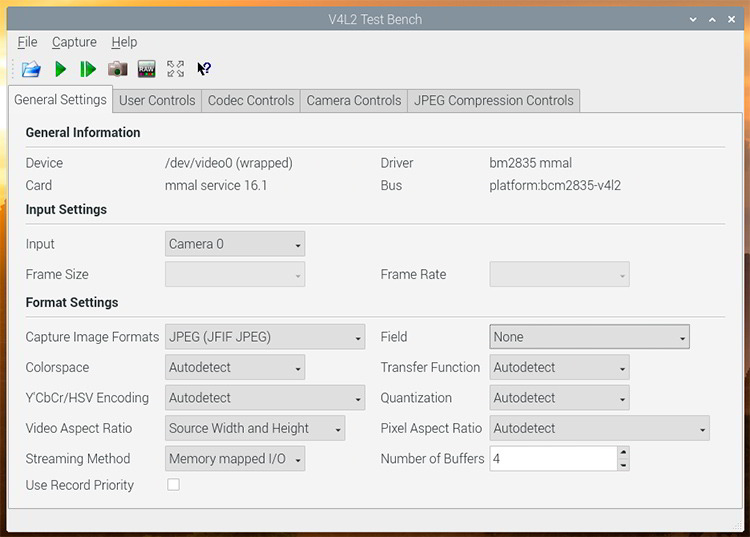
This application will give you a realtime view of your camera:
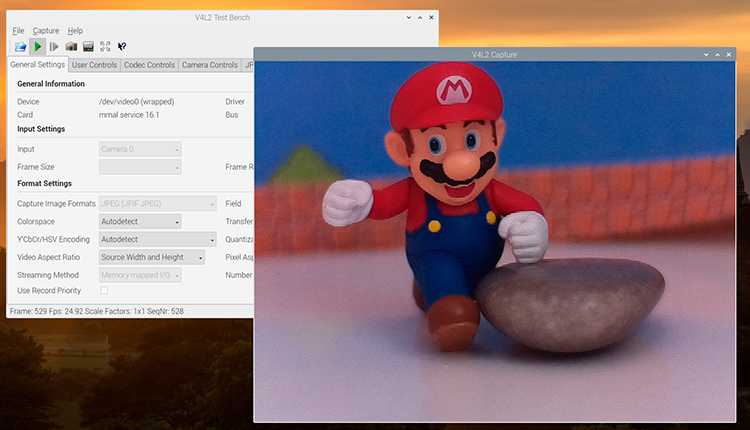
This will help you focus the lens and adjust your lighting, contrast, etc.
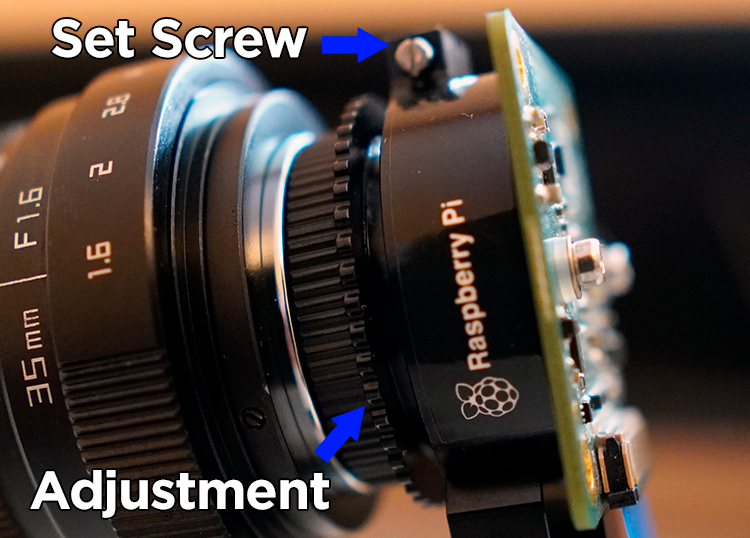
Pro tip:
You can adjust the base focal length of the lens with the camera. You can adjust back and forth depending on what subject you’re focusing on then set it with a set screw. This will make it easier to get the camera focused in.
With this, I just used a laptop to view the live preview, so I could make adjustments and fine-tune the lens focus.
Once you dial it in, you can start taking some pictures!
Capture Images with Raspistill
The easiest way to test this camera is by using Raspistill. It’s available by default in Raspberry Pi OS/Buster. Its usage is simple:
raspistill -o test.jpg
This will output a high res image like this one:
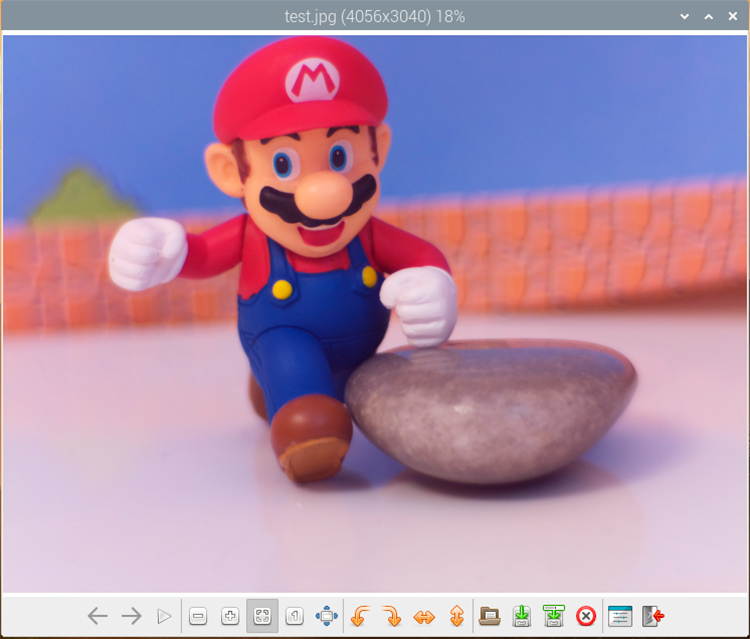
Which is exactly what we were looking at with the V4L2 capture.
Here are just a few things we can do with Raspistill:
- Change the size and quality of the image
- Set exposure/ISO other settings
- RAW mode output
Type in “raspistill” by itself to see the options.
Let’s try to add the date and time to our image. We’ll set it to a 1024 x 768 image while we’re at it:
raspistill -n -t 1000 -w 1024 -h 768 -a 1036 -ae +25+25 -o test2.jpg
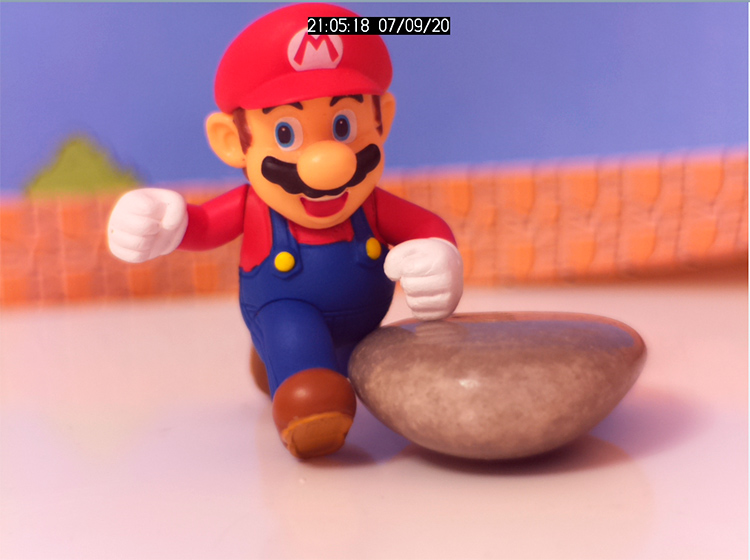
So one thing that Raspistill doesn’t allow is free form annotation or adding any text I want to the image.
With Raspistill, you can take still pictures with the camera, and they look great. There are many things you could do with this, including:
- Security camera - Take one picture a minute, and rotate out after a couple of hours
- Webcam - take pictures every minute and upload it to a web page, like the old webcams of the 90s
- Motion detection - you could set up a motion detector and have it take pictures and store them when motion is present.
There are many cool things you could do with Raspistill.
Let’s look at video!
Record Video with Raspivid
Raspivid is another cool application for interacting with the Raspberry Pi Camera Module. It’s a similar interface as Raspistill, and it’s pretty easy to use. Here’s how you can record ten seconds of video:
raspivid -t 10000 -o test.h264

You can do lots with this program as well, including changing bitrate, levels, and just about anything you can think of.
Here’s an example of the resolution far away, if you wanted to use this as a security camera:
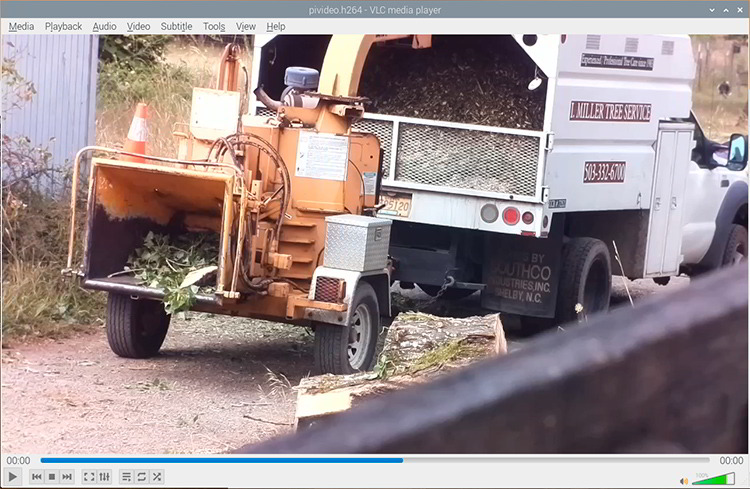
You can even record out in something like MP4. From the Raspberry Pi documentation:
You can install MP4 box:
sudo apt install -y gpac
Then
# Capture 30 seconds of raw video at 640x480 and 150kB/s bit rate into a pivideo.h264 file:
raspivid -t 30000 -w 640 -h 480 -fps 25 -b 1200000 -p 0,0,640,480 -o pivideo.h264
# Wrap the raw video with an MP4 container:
MP4Box -add pivideo.h264 pivideo.mp4
# Remove the source raw file, leaving the remaining pivideo.mp4 file to play
rm pivideo.h264
This produces a nice little MP4 file:
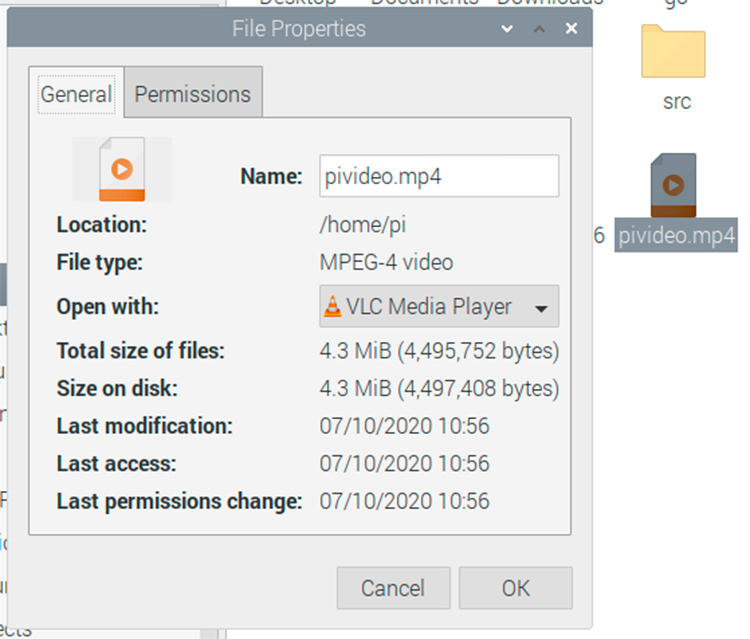
It’s easy and simple to convert.
Final Thoughts
There are many things you can do with this camera, and I plan to expand on it a lot more. My takeaways:
- I like the interchangeable lenses
- Excellent image/video quality for the price
- Easy to work with
So if you’re thinking about picking one up, I’d highly recommend it. There are a ton of great projects you can do with this.
If you want to learn more:
- Take this course to learn the Raspberry Pi
- Camera Module Documentation
- Raspistill Documentation
- Raspivid documentation
If you build any cool projects with this Let me know! I’d love to hear about it!
Want to learn more about the Raspberry Pi? Check out the Raspberry Pi for Developers course!

Skip the hype. The newsletter that keeps you in the know.
AI news curated for engineers. The AI New Hotness Newsletter is what you need.
Zero fluff. Just the research, tools, and infra updates that actually affect your production stack.
Stay up to date on AI for developers - Subscribe on LinkedIn