


How to Resize an Image with OpenCV

Jeremy Morgan 
Jan 3, 2023 - 5 min read
Last Update: Apr 4, 2023

AI changed software development. This is how the pros use it.
Written for working developers, Coding with AI goes beyond hype to show how AI fits into real production workflows. Learn how to integrate AI into Python projects, avoid hallucinations, refactor safely, generate tests and docs, and reclaim hours of development time—using techniques tested in real-world projects.
So you want to resize an image with OpenCV? You’ve found your answer. This tutorial will walk you through all the steps needed to do this.
I will use Python in this example, but it’s a similar process in many different languages. I often work with OpenCV in Go and C# as well. But let’s stay on topic here.
This will be a step by step guide to quickly resize and save an image using OpenCV.
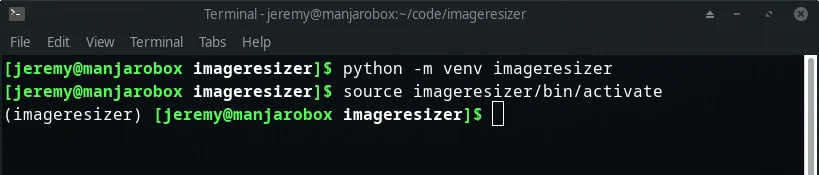
Step 1: Create a Python Virtual Environment
Whenever I do anything with Python, I create a Virtual Environment. It’s like a container for your Python application. It makes it portable and easy to manage dependencies. I’m using Linux for this, but it’s the same commands in other operating systems.
Open up a terminal window and choose the directory you’ll be building your application under. I’m using a directory named “imageresizer” because I’m great at naming things creatively.
Type in:
python -m venv imageresizer
I’m going to name the Virtual Environment as “imageresizer”. Again creativity. Let’s activate the environment:
source imageresizer/bin/activate
Great! Your Virtual Environment is ready to use.
Step 2: Select your Image
For this tutorial, I’m going to download a Photo by Philip Jahn from Unsplash.
It’s a beautiful photo and looks like this:
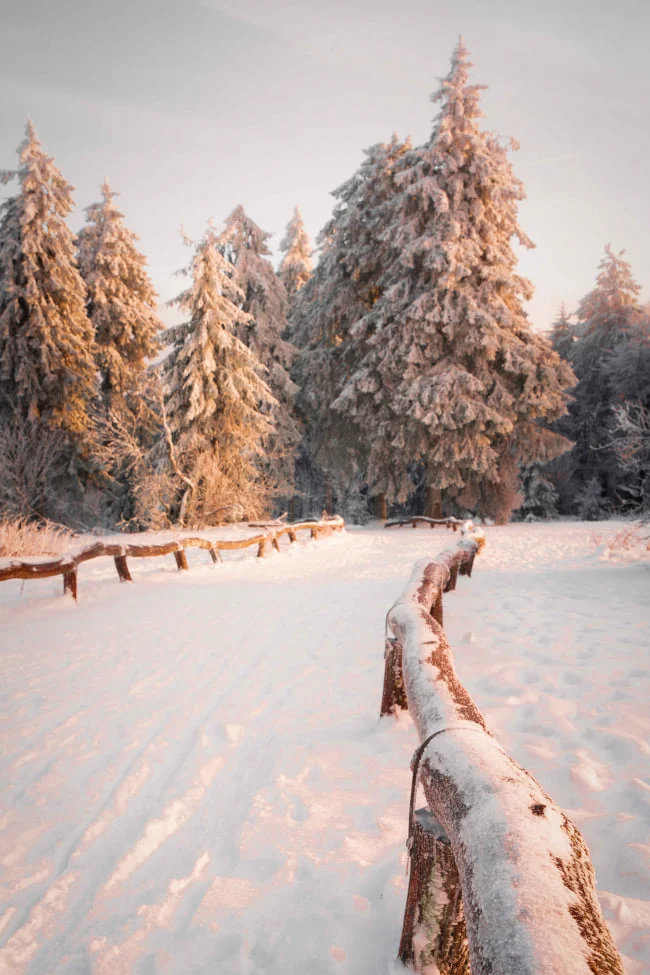
And as you can see, it’s quite large:
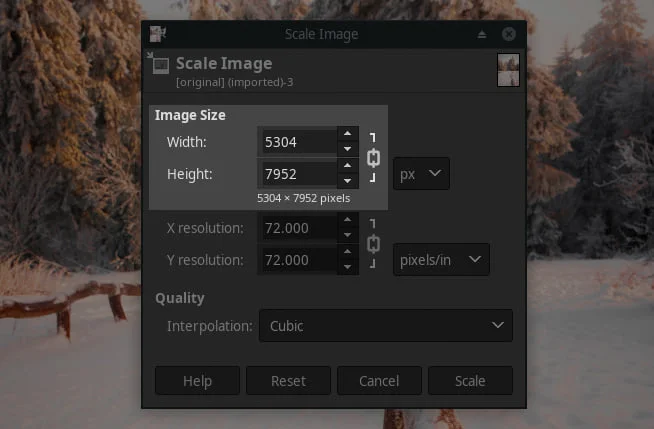
5304x7592 is excellent for printing. Not so much for the web. So how can we resize this thing without making it look funny?
We can use OpenCV! Keep reading.
Step 3: Install OpenCV
Next, we’ll need to install OpenCV in our Virtual Environment.
Type in:
pip install opencv-python
And of course, I need to update pip. Just like it says, you type in:
pip install --upgrade pip
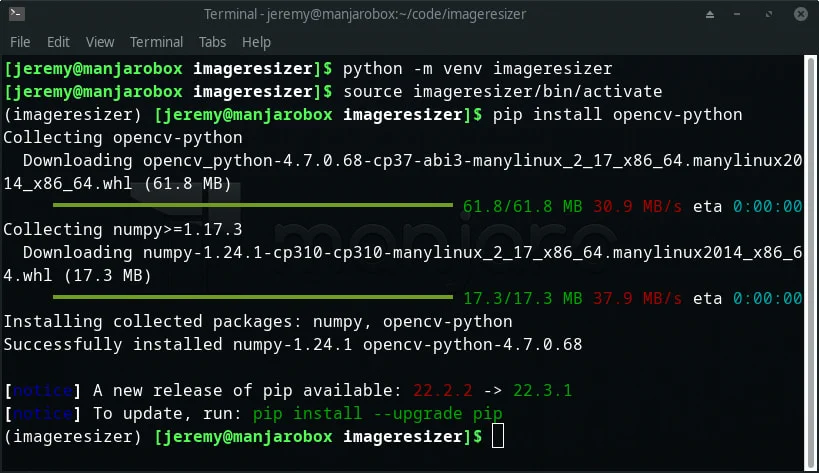
Ok, now OpenCV is installed. Let’s build our script.
Step 4: Create a Python Script
Let’s create the Python Script using OpenCV to resize the images.
The first line imports our library.
import cv2
Then we need to load the image we want to resize.
image = cv2.imread('original.jpg')
Now let’s get the original dimensions of the image:
height, width = image.shape[:2]
This uses the shape function and stores the width and height of the image.
Now we need to set the output size of the image. This determines the size you want the new image to be.
output_size = (400, 400)
One thing to note, OpenCV will scale this. So the larger dimension of the image will be 400, and the smaller dimension will be scaled with a factor.
We need to calculate that scaling factor. Since the original dimensions are not square, resizing it to a square will distort the image. This will scale the smaller dimension appropriately.
scaling_factor = min(output_size[0]/width, output_size[1]/height)
This divides the original image dimensions by the intended dimensions, then picks the smaller result for your scaling factor.
Now, we’ll resize the image. We’ll pass in the original image, x and y scaling factors, and set interpolation to cv2.INTER_AREA:
resized_image = cv2.resize(image, None, fx=scaling_factor, fy=scaling_factor, interpolation=cv2.INTER_AREA)
Finally, we’ll write the file.
cv2.imwrite('output.jpg', resized_image)
Awesome. Let’s run it!
Step 5: Run the Script
At the prompt, type in:
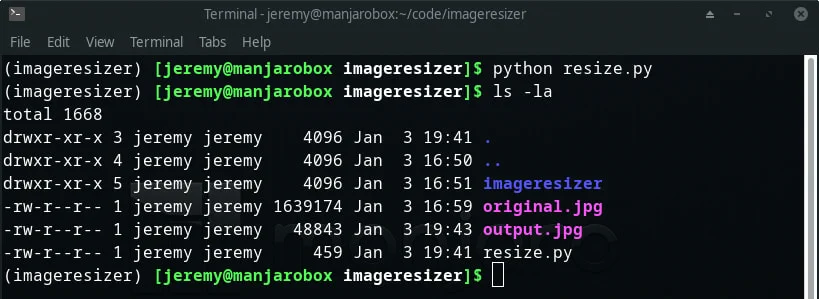
python resize.py
If it’s successful, you won’t see any output.

Now you can inspect your images. If you check the directory, you will see different file sizes, which tells you the image has changed:
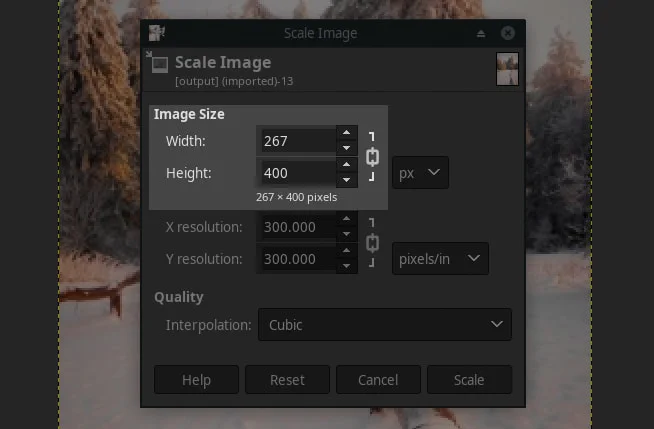
Now, if we open the image, we can see it’s 267x400! Quite a bit smaller.
Congratulations! You just resized an image with OpenCV!
Here is the final code:
import cv2

# Load the image
image = cv2.imread('original.jpg')

# Get current image size
height, width = image.shape[:2]

# Set your output size
output_size = (400, 400)

# Set the scaling factor
scaling_factor = min(output_size[0]/width, output_size[1]/height)

# Resize the image in memory
resized_image = cv2.resize(image, None, fx=scaling_factor, fy=scaling_factor, interpolation=cv2.INTER_AREA)

# Write it to a new file
cv2.imwrite('output.jpg', resized_image)
Extra Credit
We can make this script more useful. Let’s take in a parameter for the image name and the size we’d like to make it.
add the following line to the top:
import sys
Then, indent all the lines of code one tab.
Then add:
if len(sys.argv) > 1:
This statement says if arguments are passed to the command line, run the statements we just wrote to modify the image.
and change:
image = cv2.imread('original.jpg')
to
image = cv2.imread(sys.argv[1])
Then at the bottom of the script, add the following:
else:
    print("You must provide a filename of the original image")
Now when you run the script, you can put in any image name you want:
python resize.py original.jpg
If you don’t enter a filename, the script will ask you to:

There you go! Have fun playing around with this!
Summary
In this tutorial, we learned how to resize images with OpenCV. It’s pretty straightforward once you get the hang of it. It can get very complicated, however.
This is one of many tutorials I’ll be doing to help you get started with OpenCV. Bookmark my blog and come back for more!
Happy coding, and see you in the next tutorial.
- Jeremy
I have many OpenCV Demos on GitHub you can download and run. I build them on my Computer Vision live streamQuestions, comments? Yell at me!

Skip the hype. The newsletter that keeps you in the know.
AI news curated for engineers. The AI New Hotness Newsletter is what you need.
Zero fluff. Just the research, tools, and infra updates that actually affect your production stack.
Stay up to date on AI for developers - Subscribe on LinkedIn
