


How to Blink an LED on a Raspberry Pi

Jeremy Morgan 
Mar 17, 2015 - 4 min read
Last Update: Jun 7, 2024

AI changed software development. This is how the pros use it.
Written for working developers, Coding with AI goes beyond hype to show how AI fits into real production workflows. Learn how to integrate AI into Python projects, avoid hallucinations, refactor safely, generate tests and docs, and reclaim hours of development time—using techniques tested in real-world projects.
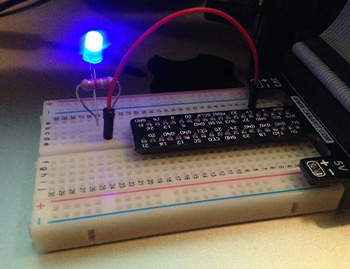
The blinking LED is the “hello world” of the maker community, and today I’ll show you how easy it is to do with the Raspberry Pi 2 (or Model B)! We’re going to use Python and WiringPi for this project.
What you’ll need
For this article I’m using a Raspberry Pi 2, but you can also use a Raspberry Pi Model B. You will also need:
- A GPIO Adapter
- Breadboard
- Resistor
- LED
What I am using for this project is the Canakit for Raspberry Pi which contains everything in the list above.
Any decent breadboard or even a set of jumpers will work for this project.
How to Blink an LED with Python
The quickest way to get that LED to blink is to take a look at the pins of the GPIO and decide which one to tie to. Then you can use Python and the Raspberry Pi GPIO Library to create a script to light it up.
import RPi.GPIO as GPIO             ## Import GPIO Library
import time                         ## Import 'time' library (for 'sleep')

blue = 7                            ## These are our LEDs
ourdelay = 1                        ## Delay
# pins 4,17,18,21,22,23,24,25

GPIO.setmode(GPIO.BOARD)            ## Use BOARD pin numbering
GPIO.setup(pin, GPIO.OUT)        ## set output

## function to save code

def activateLED( pin, delay ):
	GPIO.output(pin, GPIO.HIGH)      ## set HIGH (LED ON)
	time.sleep(delay)                ## wait
	GPIO.output(pin, GPIO.LOW)       ## set LOW (LED OFF)
	return;

activateLED(blue,ourdelay)

GPIO.cleanup()                      ## close down library
As you can see in the code above, it doesn’t take much to get things working. But I’ll explain the code a little deeper.
import RPi.GPIO as GPIO
import time
The following code imports the Python GPIO library, and the time library. The GPIO library, as you probably guessed is the library for interacting with the GPIO in Python. It does an amazing job of simplifying the process. The time library is there so we can put a delay in, otherwise the blink might be too fast to notice.
blue = 7
ourdelay = 1
Here I created a variable named “blue” (the color of the LED) and assigned it “7” which is the pin number we want. If I wanted to add multiple LEDs I could name it something like:
blue = 7
red = 13
green 14
I then created a “delay” variable of one second. This way I can change the delay of the lights blinking however I want.
You can name the variables anything you want, but this was just to make it easy to see which LED is which if I wanted to do some fancy light show.
GPIO.setmode(GPIO.BOARD)
Then, we set the GPIO mode to “Board” which means we’ll use the numbering of the pin by board instead of GPIO. This makes it a little easier to understand when using a bread board.
With this line of code we set the pin to be an output:
GPIO.setup(pin, GPIO.OUT)
There are 2 main commands to turn the LED on then off:
GPIO.output(pin, GPIO.HIGH)
GPIO.output(pin, GPIO.LOW)
If you wanted to blink an LED twice you would have to repeat the last two lines each time. So I decided to put this in a function and put the pin and delay as parameters. This way making a particular LED blink is as simple as:
activateLED(blue,ourdelay)
This is repeatable and saves code when doing larger programs.
To close everything down, we need to run the following:
GPIO.cleanup()
It’s that easy! You could easily write a nice Python script that do some pretty cool stuff with just a few lines of code.
How to Blink an LED with WiringPi
For this step we’ll install WiringPi for the libraries to interact with the GPIO. This allows us to do what we just did, but from the command line. We’ll need to install WiringPi:
cd ~/sources
git clone git://git.drogon.net/wiringPi
cd wiringPi
git pull origin
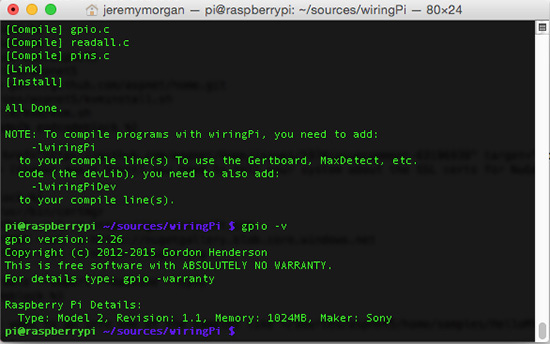
./build
If successful you should see a screen like this:
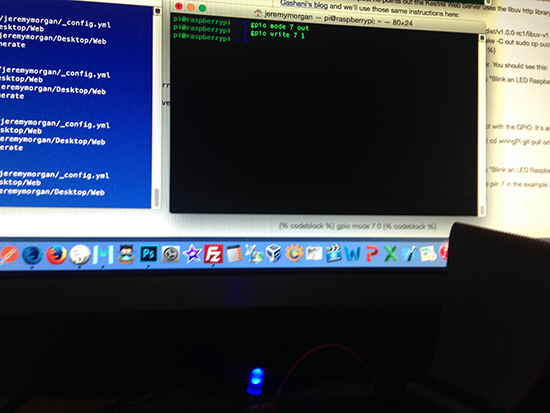
Now we can light up the LED from the command line. Remember the pin 7 in the example above? We can now light up like so:
gpio mode 7 out
gpio mode 7 1
This will light up the LED. You can turn it off by entering:
gpio mode 7 0
This makes it super easy to light up LEDs from the command line. You could create a pretty neat BASH script to do this, and do some neat things, or call this from other languages.
Summary
I hope this has helped in showing how easy it is to blink an LED on the Raspberry Pi 2/B. Of course as you progress on you’ll want to do far more than just blink an LED, but the GPIO libraries make it very easy to create some neat stuff. If you’ve experimented with this and done something cool, Let me know!!!
Want to learn more about the Raspberry Pi? Check out the Raspberry Pi for Developers course!

Skip the hype. The newsletter that keeps you in the know.
AI news curated for engineers. The AI New Hotness Newsletter is what you need.
Zero fluff. Just the research, tools, and infra updates that actually affect your production stack.
Stay up to date on AI for developers - Subscribe on LinkedIn