


Simple Thresholding with OpenCV and Python: A Beginner's Guide

Jeremy Morgan 
Apr 1, 2023 - 4 min read
Last Update: Apr 4, 2023

AI changed software development. This is how the pros use it.
Written for working developers, Coding with AI goes beyond hype to show how AI fits into real production workflows. Learn how to integrate AI into Python projects, avoid hallucinations, refactor safely, generate tests and docs, and reclaim hours of development time—using techniques tested in real-world projects.
Welcome to an exciting tutorial on computer vision! Today, we’ll dive into simple thresholding using OpenCV and Python. We’ll break down OpenCV thresholding into easy-to-understand concepts and examples that you can follow to master this skill.
What is Thresholding?
Thresholding is a foundational concept in computer vision and image processing. It’s a technique that separates an image into distinct regions based on pixel intensity values. The goal is to make the image easier to understand so that a computer can analyze it and pull out useful information.
Imagine a grayscale image where each pixel has a value between 0 (black) and 255 (white). We can apply thresholding to create a binary image, where each pixel is black or white. This makes it simpler for a computer to identify and process features like edges, shapes, and textures.
Why Use Thresholding?
Thresholding has many practical applications, including:
- Object detection and tracking
- Image segmentation
- Optical character recognition (OCR)
- Edge detection
- Noise reduction
Let’s now take a closer look at how to implement simple thresholding using OpenCV and Python.
Setting Up Your Environment
First, we need to install OpenCV and Python. You can find installation guides for OpenCV here and Installation guides for Python here.
Let’s create and activate a Python Virtual Environment:
python -m venv thresholddemo
source thresholddemo/bin/activate
and install our tools:
pip install opencv-python matplotlib numpy
Once you’ve set up your environment, create a new Python file and import the following libraries:
import cv2
import numpy as np
from matplotlib import pyplot as plt
Loading an Image
To start, let’s load a grayscale image. You can use any image you like, but we’ll use this sample image of a pickup truck for this tutorial.

I took this picture. You can use it however you like. Download it here
Save the image in your project folder and load it using the following code:
image = cv2.imread("images/pickup.jpg", cv2.IMREAD_GRAYSCALE)
Applying Simple Thresholding
With our image loaded, it’s time to apply thresholding. In OpenCV, we can use the threshold() function to do this. The function takes three arguments: the source image, threshold, and maximum value. It returns two values: the threshold value used and the thresholded image.
threshold_value = 127
max_value = 255

ret, thresholded_image = cv2.threshold(image, threshold_value, max_value, cv2.THRESH_BINARY)
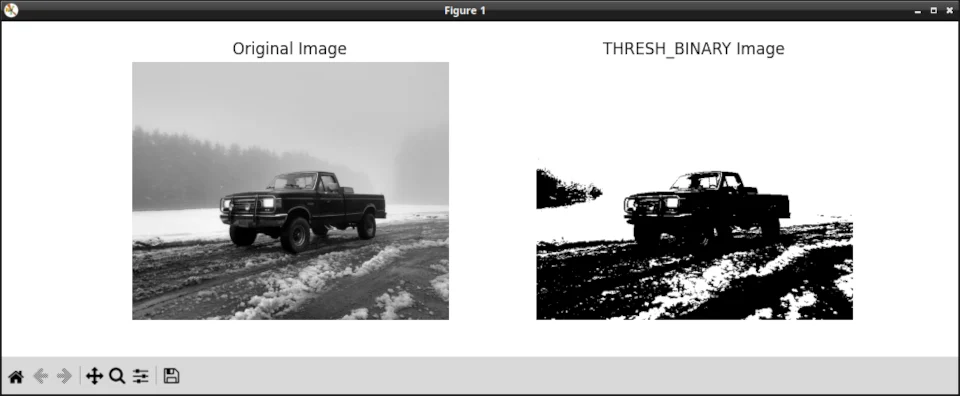
In this example, we set the threshold value to 127. If a pixel’s intensity is greater than or equal to 127, it will be set to the maximum value (white). Otherwise, it will be set to black.
Visualizing the Results
Let’s visualize our original and thresholded images using matplotlib:
plt.subplot(1, 2, 1)
plt.imshow(image, cmap='gray')
plt.title("Original Image")
plt.axis("off")

plt.subplot(1, 2, 2)
plt.imshow(thresholded_image, cmap='gray')
plt.title("Thresholded Image")
plt.axis("off")

plt.show()
This code will display both the original grayscale image and the thresholded image, allowing you to compare the results. You should see that the thresholded image is much simpler, with a clear distinction between the pickup and the background.
Binary Thresholding is just one of many techniques. You can choose a technique based on what produces the best output for your purposes. Let’s look at them.
Thresholding techniques
There are five techniques available to us for simple thresholding.
- THRESH_BINARY
- THRESH_BINARY_INV
- THRESH_TRUNC
- THRESH_TOZERO
- THRESH_TOZERO_INV
Let’s see what our image looks like, using each of these techniques.
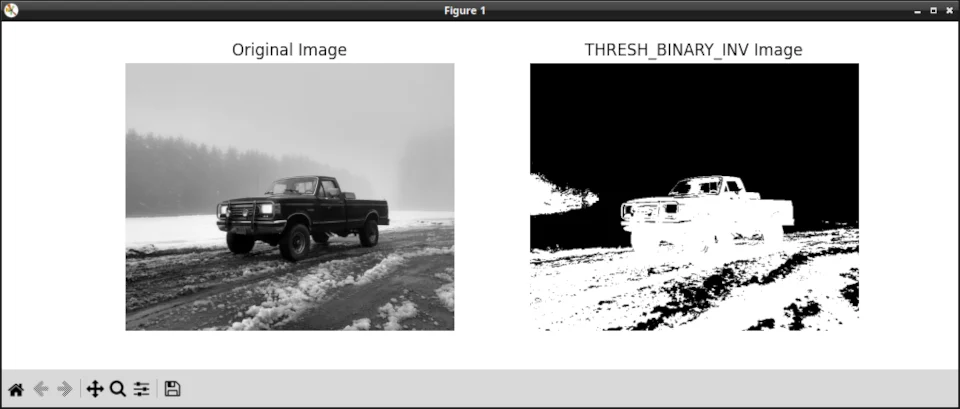
THRESH_BINARY_INV
This is similar to THRESH_BINARY, but the roles of black and white are reversed. Pixels with intensity values greater than the threshold value are set to 0, while all other pixels are set to the maximum intensity value.
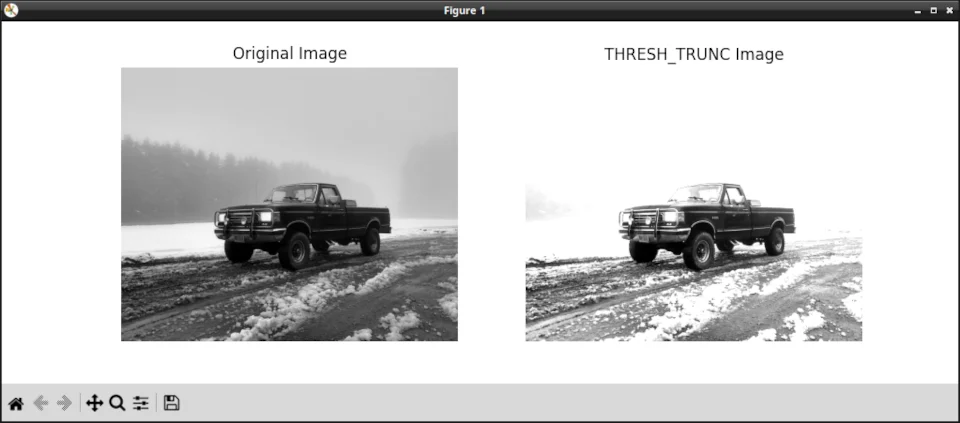
THRESH_TRUNC
In this technique, pixels with intensity values greater than the threshold value are set to the threshold value, while all other pixels remain unchanged.
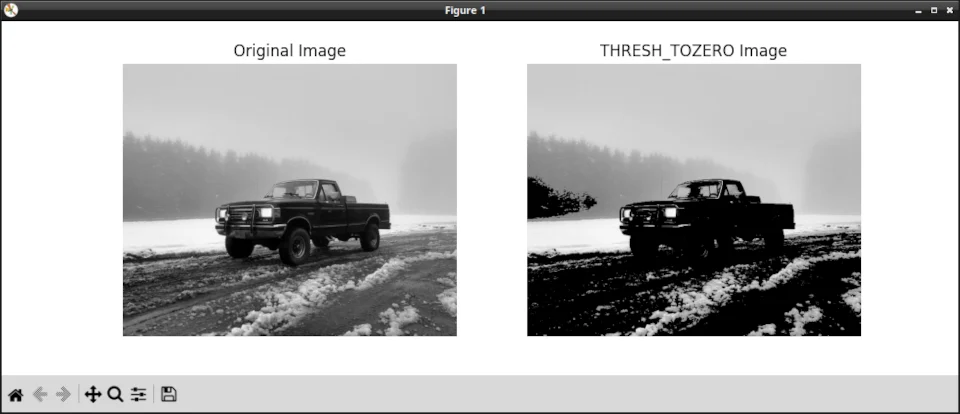
THRESH_TOZERO
In this technique, pixels with intensity values less than the threshold value are set to 0, while all other pixels remain unchanged.
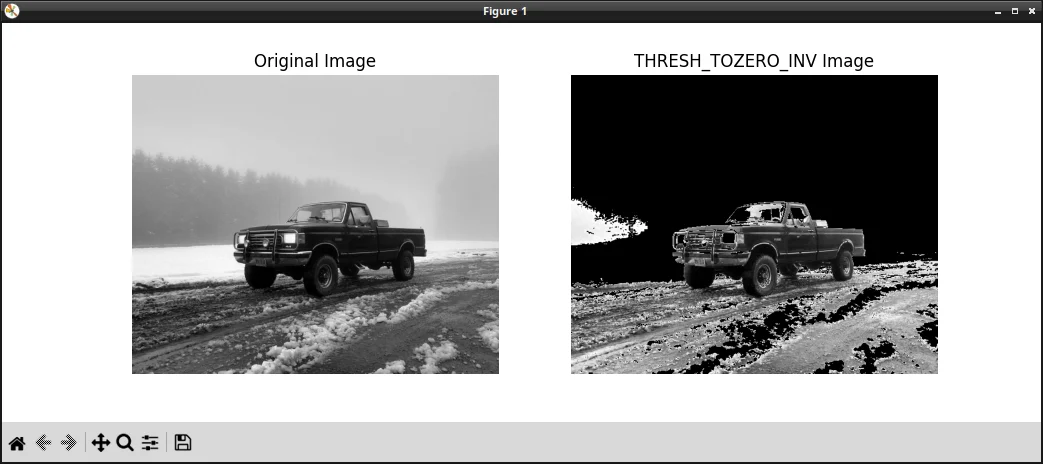
THRESH_TOZERO_INV
This is similar to THRESH_TOZERO, but the roles of black and white are reversed. Pixels with intensity values less than the threshold value are set to the maximum intensity value, while all other pixels remain unchanged.
Trying Different Threshold Values
Feel free to experiment with different threshold values to see how they affect the resulting image. For instance, setting the threshold value to 100 or 150 and observing the changes. A lower threshold value will produce more white pixels, while a higher value will produce more black pixels.
# Set different threshold values
threshold_values = [100, 150]

for value in threshold_values:
    ret, thresholded_image = cv2.threshold(image, value, max_value, cv2.THRESH_BINARY)

    plt.imshow(thresholded_image, cmap='gray')
    plt.title(f"Thresholded Image with Value {value}")
    plt.axis("off")
    plt.show()
Wrapping Up
Congratulations! You’ve learned how to do simple thresholding with OpenCV and Python. You now have a solid foundation on which to build and learn more advanced thresholding techniques, such as adaptive thresholding and Otsu’s method.
Remember to keep experimenting and tweaking your code to better understand how thresholding works and how it can be applied to various computer vision tasks.
Happy coding, and see you in the next tutorial.
- Jeremy
I have many OpenCV Demos on GitHub you can download and run. I build them on my Computer Vision live streamQuestions, comments? Yell at me!

Skip the hype. The newsletter that keeps you in the know.
AI news curated for engineers. The AI New Hotness Newsletter is what you need.
Zero fluff. Just the research, tools, and infra updates that actually affect your production stack.
Stay up to date on AI for developers - Subscribe on LinkedIn