


Getting Started with WSL

Feb 15, 2020 - 5 min read
Last Update: Jun 7, 2024
Windows Subsystem for Linux (WSL) is awesome.
It gives you the power to use Linux within your Windows system. A Linux shell can be difficult to learn, but the payoffs are incredible. You can become insanely productive with it. I encourage every Windows developer to give this a try.
Early in my development career, I was a Unix/Linux developer, and I loved working with the shell. In 2010 I was thrust into the world of Windows with GUIS. There was PowerShell and some workarounds, but it wasn’t quite the same. While I eventually gained proficiency and speed at first, it was a drag.
The most significant advantage of WSL right now is improving productivity and bringing powerful Linux programs directly to your Windows desktop. So let’s try it out!
Get WSL
Open up PowerShell as an administrator:
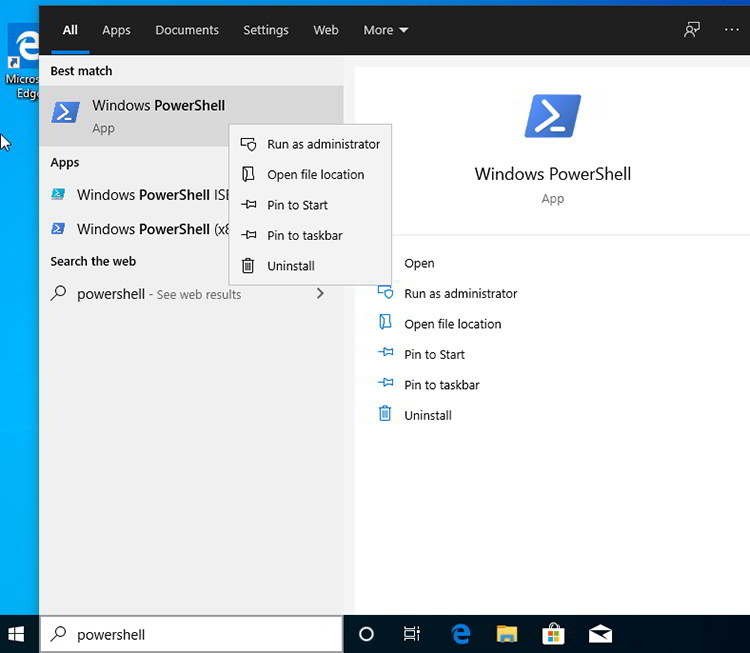
Run the following command
Enable-WindowsOptionalFeature -Online -FeatureName Microsoft-Windows-Subsystem-Linux

Restart the machine as directed.
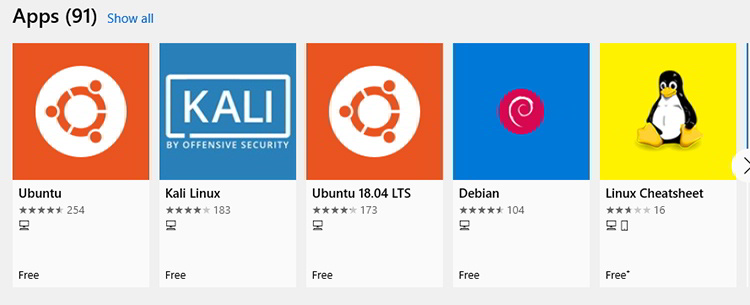
Now we need to install a Linux system. You can find plenty of them in the Microsoft Store:
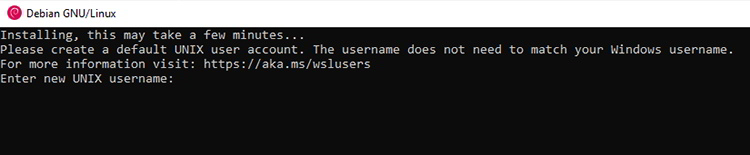
Or you can just install it on the command line. For this tutorial I’ll be using Debian. You can install it from a PowerShell prompt with this command:
Invoke-WebRequest -Uri https://aka.ms/wsl-debian-gnulinux -OutFile Debian.appx -UseBasicParsing
.\Debian.appx

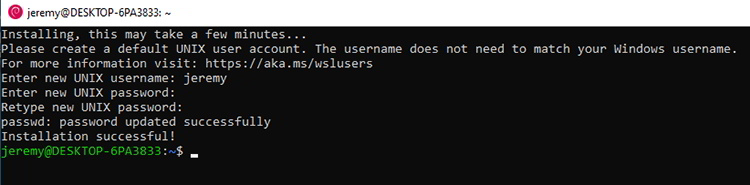
Now you’ll be asked for a username and password. This doesn’t have to be your Windows credentials, they’re completely separate.
After you enter that, you’re done! You’ve installed Linux on your Windows system.
You can find it in your start menu:
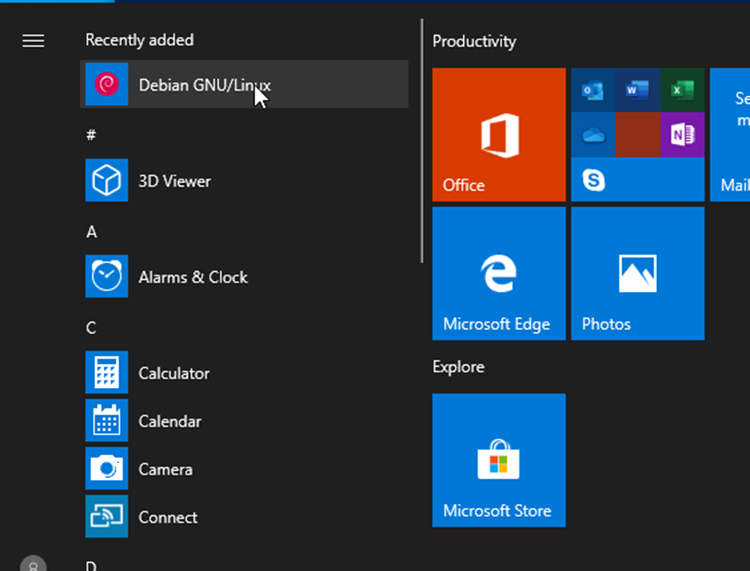
And it’s ready to go!
Install Terminal
So if you’re going to be using WSL and doing prompt things, Windows Terminal is pretty awesome. Let’s add that. Search the Windows Store for “Windows Terminal”
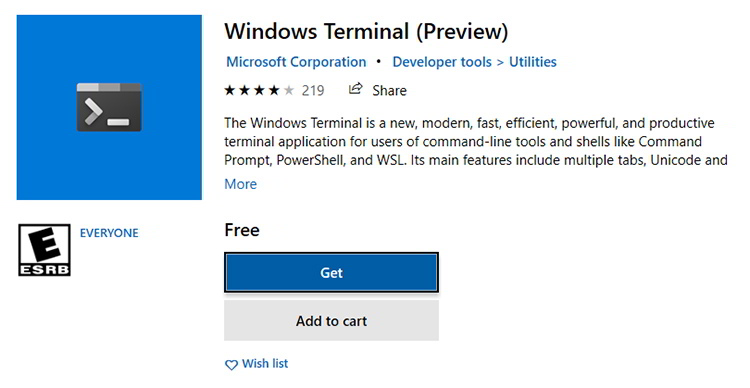
Click “Get” then “Install”
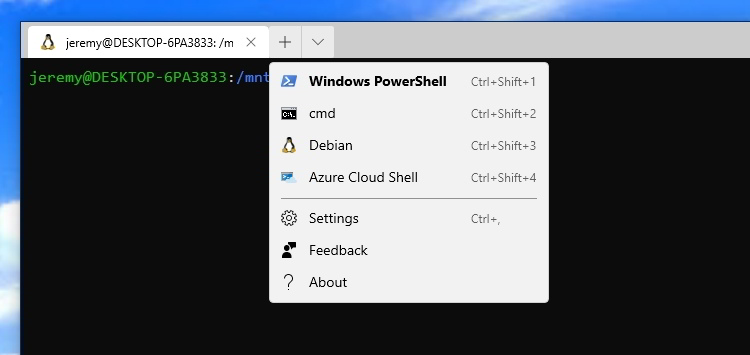
With Terminal, you can keep PowerShell, command line, WSL prompts, and more all in one place. It’s very convenient.
So let’s do some stuff!
The Basics
So if you’ve never used Linux before and want to know how to get around, you’ve come to the right place. Here are some basic commands you can use to get started.
Where am I?
You can find out where you’re at on the file system by typing
pwd
Result:

Create a Folder
In Linux we call these “directories” and you create new ones by typing in
mkdir (name of directory)
We’ll create one called “stuff”.
mkdir stuff
Go into that Folder
Now let’s go into that folder by typing in cd (change directory)
cd stuff
Now type in pwd and you can see we’re in the “stuff” directory.

Let’s create some files in that folder:
touch file1.txt
The “touch” command creates an empty file with whatever name you specify. So now we have a blank file named “file1.txt”
Let’s create a few more:
touch file2.txt file3.txt file4.txt
Now we have four files in the folder. But how would we know that?
Show all the files in a folder
We do that by typing in
ls -la
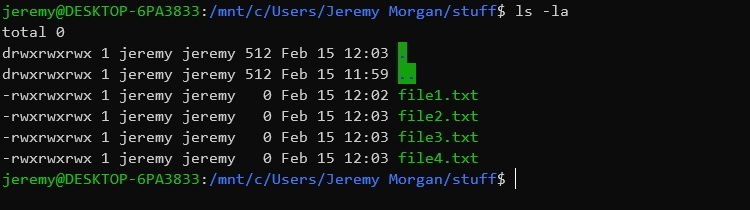
ls is the command to list the directory contents, and the -la tells it to list everything, including hidden files.
We can see every file in the directory.
Let’s create a couple more files:
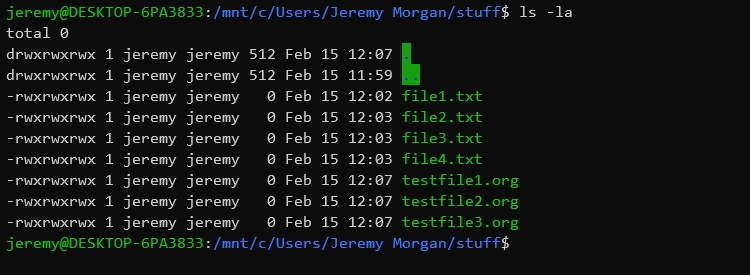
touch testfile1.org testfile2.org testfile3.org
Now we run ls and see our added files.
But what if we only want to see the .org files we just created?
Choosing Which Files to Show
We do that with wildcards (*), if we only want to see the .org files, we type in
ls *.org
The star means “everything,” so we want everything with a filename that has .org at the end of it.

If we only want to see files with the number 3 in them?
ls *3*
You can place wildcards anywhere in the string, so it shows every file name with a 3 in it:

Pretty cool huh? What if we want to remove a file?
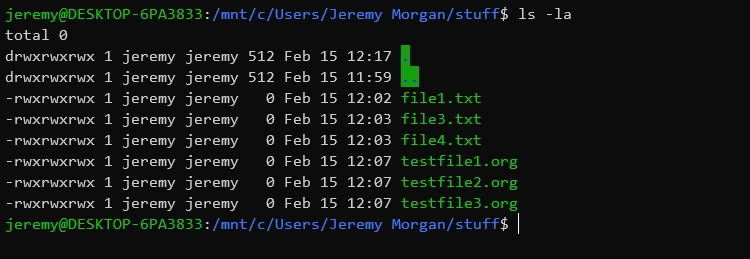
rm file2.txt
rm will remove the file. If we type in ls we’ll see that it’s gone now:
Wildcards also work with rm. We can remove all those .org files we just created:
rm *.org
Now if we run ls -la again we can see the files are gone:

Removing a Folder
So what if I want to remove this folder full of files I just created?
To leave the folder and go back to my home folder, I type
cd ..
then type in
rm -rf stuff
And that removes the folder. Easy!
Conclusion
So in this tutorial, we got familiar with WSL and how to use it. We did the following:
- Enabled WSL
- Installed Debian Linux
- Installed Windows Terminal
- Created a folder
- Created empty files
- Deleted files
This is enough to get started navigating and moving things around. We’re just scratching the surface of all the cool things you can do with WSL. If there’s enough interest, I’ll keep building more of these tutorials and expand on it.
Want to know more about Linux Commands? Check out this guide on Linux Command Line Fundamentals
Let me know what you think of this tutorial and some cool things you’ve done with WSL!!

Want to learn more about Linux? Of course you do. Check out this Linux Fundamentals course. You can sign up for a free trial here and take it today!
Follow @JeremyCMorgan

Skip the hype. The newsletter that keeps you in the know.
AI news curated for engineers. The AI New Hotness Newsletter is what you need.
Zero fluff. Just the research, tools, and infra updates that actually affect your production stack.
Stay up to date on AI for developers - Subscribe on LinkedIn