


Unit Testing with .NET Core

Jeremy Morgan 
Mar 29, 2018 - 6 min read
Last Update: Dec 31, 2022

AI changed software development. This is how the pros use it.
Written for working developers, Coding with AI goes beyond hype to show how AI fits into real production workflows. Learn how to integrate AI into Python projects, avoid hallucinations, refactor safely, generate tests and docs, and reclaim hours of development time—using techniques tested in real-world projects.
So you’ve just started building .Net Core applications and really starting to gain some traction. You quickly learn how mature and thorough the .Net Core framework is becoming and think “I need to start writing some unit tests for this!”. As it turns out, it’s super easy and very intuitive, especially for C# developers.
So let’s walk through building Unit Tests for .NET Core apps.
Let’s Build a Class Library
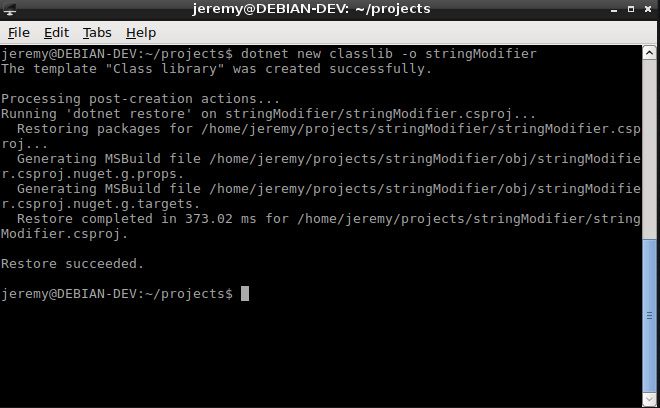
For this tutorial we’ll build a simple class library called “string modifier”. As the name suggests, it will be used to modify strings. We’ll use the .NET Core CLI to create a new class library.
dotnet new classlib -o stringModifier
You should see something that looks like this:
This uses the dotnet CLI to create a new class library in the folder named stringModifier. It creates an application that is essentially just a basic class. We’re going to name this something a bit more useful though.
rename your class to ChangeMyString. It should look like this:
using System;

namespace stringModifier
{
    public class ChangeMyString
    {
    }
}
We’re going to create a library that modifies strings for us, so let’s add a couple methods to our string modifier library.
public static string makeAllUppercase(string inputString){
    return inputString.ToUpper();
}
This method will make any string you send it all uppercase.
The next method will reverse a string:
public static string makeReverse(string inputString){
    char[] arr = inputString.ToCharArray();
    Array.Reverse(arr);
    return new string(arr);
}
Now these are obviously for demo purposes and easy to see what they do, but let’s do a quick smoke test with them.
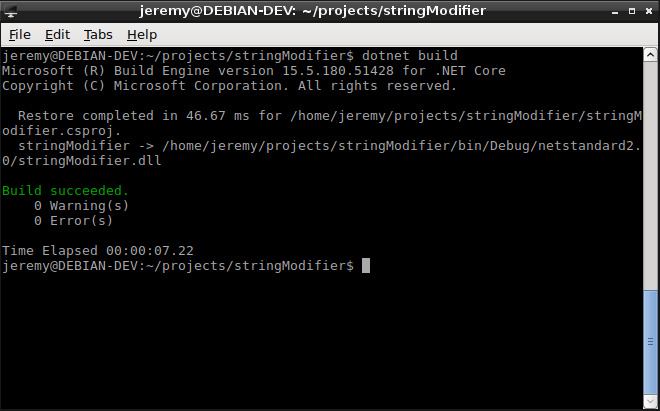
Let’s make sure the application builds. Run the following in the folder your project is located in:
dotnet build
It should look like this:
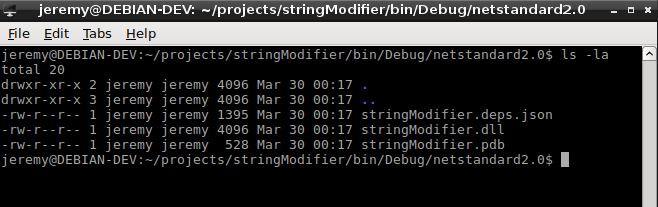
And we can go into our BIN folder and verify the artifacts were generated:
Now you’re ready to go.
Smoke Test
Let’s build a quick console application that calls the class library just to do a quick visual test of functionality. Exit out of the project folder, and we want to use the dotnet CLI to create a runner for this.
dotnet new console -n smrunner
This will create a simple “hello world” application for us. Open up Project.cs and add the following using:
using stringModifier;
then add the following into the Main method:
Console.WriteLine("Hello World!");
Console.WriteLine(ChangeMyString.makeAllUppercase("Hello World!"));
Console.WriteLine(ChangeMyString.makeReverse("Hello World!"));
The entire method should look this:
using System;
using stringModifier;

namespace smrunner
{
    class Program
    {
        static void Main(string[] args)
        {
            Console.WriteLine("Hello World!");
            Console.WriteLine(ChangeMyString.makeAllUppercase("Hello World!"));
            Console.WriteLine(ChangeMyString.makeReverse("Hello World!"));
        }
    }
}
Now, back at the command line, let’s add a reference to our class library:
dotnet add reference "../stringModifer/stringModifier.csproj"
This will add the reference to the class library automatically. You could also manually put in the following in the .csproj file:
<ItemGroup>
    <ProjectReference Include="..\stringModifier\stringModifier.csproj" />
</ItemGroup>
Either way is fine. Now we’re ready to run it:
dotnet run
You should see something that looks like this:
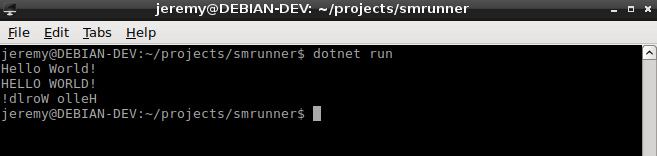
Now we can verify that the methods work as we expect them to. But we’ll add some unit tests to be sure.
Remember: Unit tests are not just to check the individual functionality of a method. They also check the functionality does not change when other parts of the application change. This is part of what makes them so important.
Building the Unit Tests
Let’s build a separate project for the unit tests. This is the project you’ll run after a build, or preferably automatically on a build server every time you deploy.
Exit out of the directory you were just in and let’s use the dotnet CLI to create yet another project. This will be an MSTEST Unit Test project.
dotnet new mstest -o libraryTester
This creates a unit test project in the libraryTester directory. Now we open up UnitTest1.cs, and this should look really familiar to you if you’ve built unit tests before. This looks identical to tests in conventional .Net.
So let’s add a couple tests.
First we need to add a using statement to include the library.
using stringModifier;
The first tests we want to run are to make sure the test method returns a string. Now we know the return type of these methods, but we want to make a test to catch it if everyone ever changes that:
[TestMethod]
public void TestMUCReturnsString()
{
    string sample = "Test String";
    Assert.IsInstanceOfType(ChangeMyString.makeAllUppercase(sample), typeof(string));
}

[TestMethod]
public void TestMRReturnsString()
{
    string sample = "Test String";
    Assert.IsInstanceOfType(ChangeMyString.makeReverse(sample), typeof(string));
}
Next we want to test the actual functionality of the methods. So we have a couple test cases here to do that.
[TestMethod]
public void TestMakeAllUppercase()
{
    string sample = "Test String";
    Assert.AreEqual(ChangeMyString.makeAllUppercase(sample), "TEST STRING");
}

[TestMethod]
public void TestMakeReverse()
{
    string sample = "Test String";
    Assert.AreEqual(ChangeMyString.makeReverse(sample), "gnirtS tseT");
}
Now what we are doing here is asserting what we expect the method to return, and then inserting test string in the method to see if it matches what we expect.
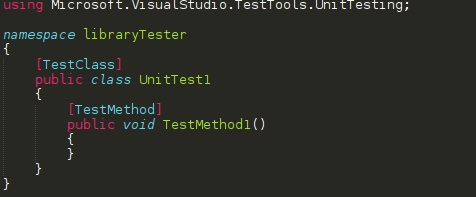
This is what the final file should look like:
using Microsoft.VisualStudio.TestTools.UnitTesting;
using stringModifier;
namespace libraryTester
{
    [TestClass]
    public class UnitTest1
    {
        [TestMethod]
        public void TestMUCReturnsString()
        {
            string sample = "Test String";
            Assert.IsInstanceOfType(ChangeMyString.makeAllUppercase(sample), typeof(string));
        }

        [TestMethod]
        public void TestMRReturnsString()
        {
            string sample = "Test String";
            Assert.IsInstanceOfType(ChangeMyString.makeReverse(sample), typeof(string));

        }

        [TestMethod]
        public void TestMakeAllUppercase()
        {
            string sample = "Test String";
            Assert.AreEqual(ChangeMyString.makeAllUppercase(sample), "TEST STRING");
        }

        [TestMethod]
        public void TestMakeReverse()
        {
            string sample = "Test String";
            Assert.AreEqual(ChangeMyString.makeReverse(sample), "gnirtS tseT");
        }
    }
}
These are some pretty basic tests, but should be good for now. Let’s try it out.
Now we’re in the library tester folder, and In order to build this, we’ll have to add a reference again.
dotnet add reference "../stringModifier/stringModifier.csproj"
Now let’s test the build.
dotnet build
It looks like we don’t have any failures here so we should be good to go.
To run the tests we’ll type in
dotnet test
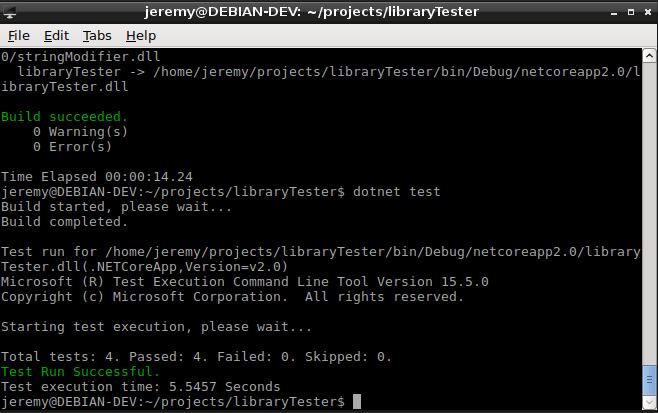
And our tests are successful! We can see that 4 tests were run and everything is green.
Now, let’s break a test just to see what that looks like.
Let’s go back to our original library. Change this:
public static string makeAllUppercase(string inputString){
    return inputString.ToUpper();
}
to this:
public static string makeAllUppercase(string inputString){
    return inputString;
}
Let’s refactor the method to pass through the string instead of making it upper case. Save it and build it.
dotnet build
And go back into our library tester folder, and run a test again:
dotnet test
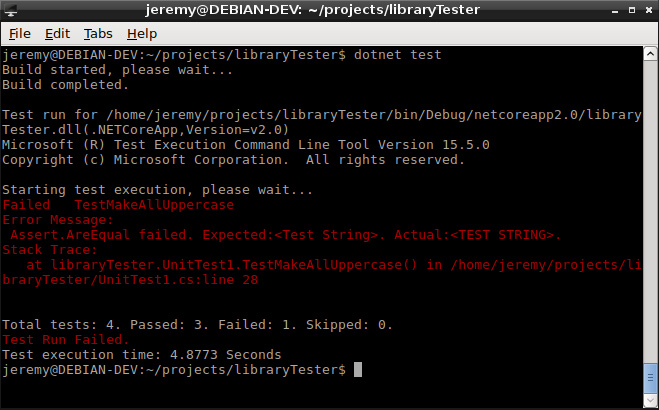 And now we have a failure. As you can see by the splash of red on the screen it threw an error. It expected test string to be in all caps, and it’s not.
This is a great feature of unit tests, if some yahoo goes in and refactors something and breaks the functionality, your test will pick it up right away.
This is how easy it is to build unit tests in .NET Core!!
Conclusion
Unit tests are super important. I’m not going to use this tutorial as a lecture, but they’re well worth your time and too frequently overlooked. Just because you’re developing .NET Core apps doesn’t mean they can’t be unit tested, MSTEST seems to work very well with everything I’ve done with it so far. So do it!!
Can you beat my SkillIQ Score in C#??
I think you can! Take the C# test here to see where you stand!

Skip the hype. The newsletter that keeps you in the know.
AI news curated for engineers. The AI New Hotness Newsletter is what you need.
Zero fluff. Just the research, tools, and infra updates that actually affect your production stack.
Stay up to date on AI for developers - Subscribe on LinkedIn