


How to Learn C# Part 3 - Coding Basics

Jeremy Morgan 
Nov 19, 2012 - 12 min read
Last Update: Jun 7, 2024

AI changed software development. This is how the pros use it.
Written for working developers, Coding with AI goes beyond hype to show how AI fits into real production workflows. Learn how to integrate AI into Python projects, avoid hallucinations, refactor safely, generate tests and docs, and reclaim hours of development time—using techniques tested in real-world projects.
This tutorial is part of a series. You can see the other tutorials below:
| Beginning C# |
|---|
| 1. Introduction |
| 2. Namespaces |
| 3. Coding Basics |
| 4. Variables and Types |
| 5. Selection Statements |
| 6. Iteration Statements |
In this third installment of my C# .NET tutorial series I’m going to talk about the basics. We’ve slung a little code and covered namespaces pretty good, and now we’re going to look at some things you’ll need to know to write code effectively in C#. I won’t dig too deep into these concepts, but give you a good overview of the basics.
If you’ve already done some C# or have experience with another programming language you can probably just skim this tutorial and go to the next one.
How to compile the examples
I’m working off some feedback here, and I didn’t give enough detail in the first chapter about running your programs. There are two ways to do it.
Option 1: Compiling from the prompt
This is the way you should be doing these exercises so you can be more familiar with coding by hand. When compiling from the command prompt you use csc.exe to compile the files. You likely won’t be doing it this way as you progress but for learning it’s a great way to learn the basics. Here is how it works.
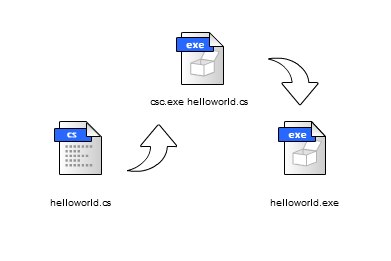
You type all your code into a text file (in this example helloworld.cs) and then compile it with csc.exe by typing “csc helloworld.cs”. This creates an executable file called helloworld.exe which you can run by typing in “helloworld” and pressing return.
You will need to create a folder on your hard drive for these files, and you will have to add csc to your path which I outlined in Chapter 1. Or you can use the Visual Studio Command Prompt which will have CSC in its path:
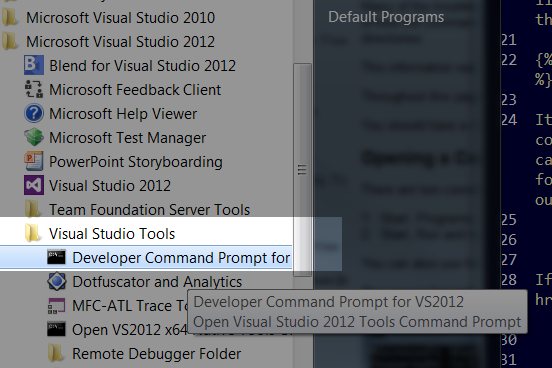
If you’re not too familiar with working from the command prompt, check out this Guide to the Command Prompt to learn the basics.
Option 2: Compiling from Visual Studio
Compiling in Visual Studio is even easier, you can find the green “start debugging” button at the top:
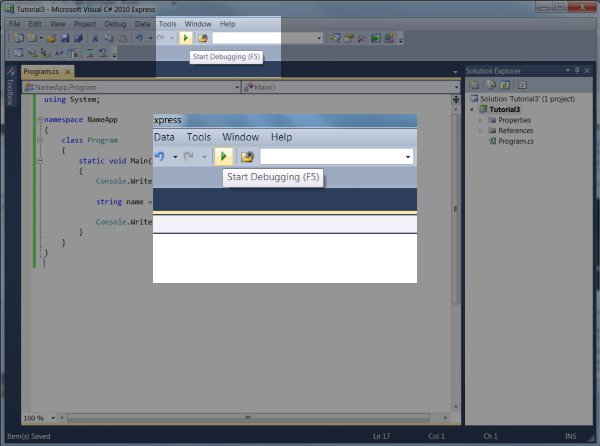
You just press the button or F5 to compile and run the program.
One thing you might notice if you’re building a console app such as our hello world app: it flashes on the screen and dissapears. This is because Visual Studio opens up a window, runs the programs and then exits.
There are two ways you can solve this, one is to force your program to wait for input, by putting the following in your code:
Console.ReadLine();
This will wait for your input before closing the window. An even better and easier option is to simply press CTRL+F5 to run the program, it will compile and run, then ask the user to press a key go back. It will look like this:
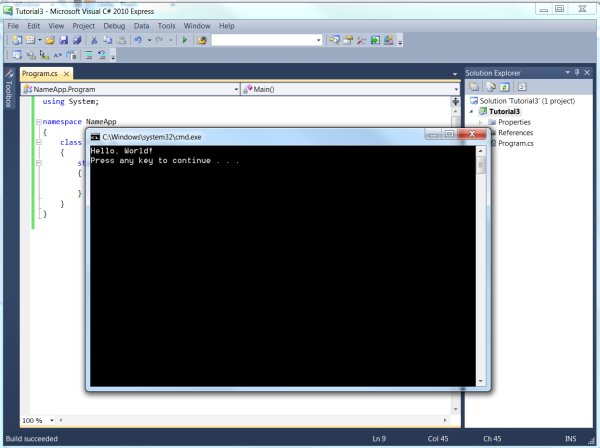
TIP: Learn the hotkeys. In nearly every industry where you see people working with development environments whether it’s Visual Studio, Eclipse, Photoshop, Illustrator, etc you’ll notice the professionals rely heavily on hot keys in their daily work. There is a learning curve to knowing all the different key combinations and it takes time to get used to them, but once you do you will enjoy years of better productivity. I highly recommend getting into the habit now so you can work better later.
So now that you know the basics of how to compile your program, let’s get started on some more basics of application construction.
Basic Structure of a Program
Let’s take another look at our hello world app:
using System;

namespace HelloWorldApp
{
	class Program
	{
		static void Main()
		{
			Console.WriteLine("Hello, World!");
		}
	}
}
Here is what we can see in our program:
As you can see the curly braces organize the parts of the program for you. The namespace is contained in the topmost and bottom brace. The “Program” class is in the set of braces past that, and the Main() method is contained in yet another set of braces. These are here so you can organize your program and the compiler can figure out what you’re trying to do.
Using Directive - This allows you to declare the types in that namespace to be used without qualifying them. I explain this in more detail in part 2 of this series covering namespaces.
namespace - this defines your namespace, something we also covered in Chapter 2. This declares your code lives in the HelloWorldApp namespace.
class - classes are constructs to create a set of custom types and grouping them together in an object. In this case our class name is “Program”. A class is a blueprint or template for data, which is mostly types, methods and events. I’ll go over this more in detail later, also to learn more about classes check out my Intro to Object Oriented Programming.
static void Main() - This is a function named Main(), which is a reserved name for the entry point of the program. You define this so the compiler knows where to start. The word “void” declares what type of data this will return, in this case nothing. “Static” means this class member can be called without creating an instance of the class, something I’ll explain in future tutorials.
This is the hello world app explained, but it doesn’t do much. Let’s make it do something.
Getting Input
Make a copy of the helloworld.cs or create a new file named myname.cs, with the following code:
using System;

namespace NameApp
{
	class Program
	{
		static void Main()
		{
			Console.WriteLine("What is your name?");

			string name = Console.ReadLine();

			Console.WriteLine("Hello {0}, nice to meet you!", name);
		}
	}
}
Type in “csc name.cs” and run it.
As you can see, this application has some new code to it. Here are the steps:
- Display text asking for a name
- Create a variable called string, and get its input from Console.ReadLine()
- Write a new string with the variable inside and output it to the console.
This is a very basic example of input and output (I/O) with a console application.
The method Console.ReadLine() reads a line of text from the console. When you press return it lets the method know to capture what was just typed.
The data that you entered was then entered into a variable which is a space to put data. The name of the variable is “name” and before that you see the word “string” which lets the compiler know to expect a string as the type of data to be stored in name.
There are a few ways we could initialize, or create the string variable:
Method 1: Initialize it as blank and assign later
string name;

name = "Jeremy";
Method 2: Initialize it and populate it:
string name = "Jeremy";
Method 3: Populate it with an expression
string name = Console.ReadLine();
There are other ways we can populate variables, and we’ll get to them all soon.
In Console.WriteLine() we used a symbol - {0} as a placeholder to be populated with data later. After the string was output, the 2nd parameter was specified as “name” to let the WriteLine method know to replace {0} with the data from the string variable.
You can play around with this little, in fact lets make some changes. Create the following:
using System;

namespace NameApp
{
	class Program
	{
		static void Main(String[] args)
		{
			Console.WriteLine("Hello {0}, nice to meet you!", args[0]);
		}
	}
}
Type in csc name.cs and then run it by typing in name.exe.
Did you get the following error?
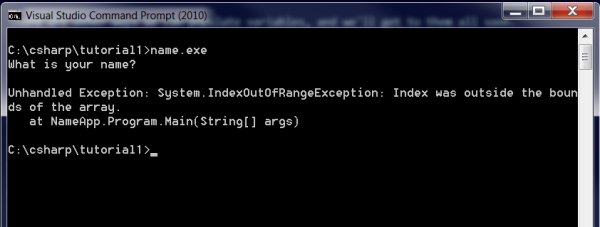
Don’t fret, it’s no big deal, the reason you got that error was because the application tried to use the args[0] variable but there was nothing there. I tricked you! You must put something after the executable name, that’s what an “argument” is. If you noticed the difference in the Main() method,
static void Main(String[] args)
we ask for arguments to be passed into a string array called args. Then each argument is placed into that string array so you can use it. Try running it with your name as an argument.
name.exe Jeremy
Now, you see the output you expected, right? The WriteLine method still builds a string with {0} as a placeholder but then relies on args[0] for the data it needs. The [0] means its the first element in the list (computers start numbering at 0) or the first argument after the executable name. A string array is simply a list of strings. Let’s modify our program a bit more. Change line 9 to look like this:
Console.WriteLine("Hello {0} {1}, nice to meet you!", args[0],args[1]);
As you can see we now have two placeholders, {0} and {1} to contend with in the string. After the string output is declared we see args[0] and args[1] which are the strings we use. Compile it and type in your full name this time.
name Jeremy Morgan
See the output? This is how you take arguments from a command line.
Here’s a cool little trick. Change your program with the following code:
using System;

namespace NameApp
{
	class Program
	{
		static void Main(String[] args)
		{
			foreach (string s in args)
			{
				Console.WriteLine(s);
			}
		}
	}
}
In this example we’ll loop through our string array, and display everything that’s in it. The foreach statement loops each time there is a new element in a string and creates the “s” variable to put it in. Within the curly braces of that loop the WriteLine method will output the contents of the “s” variable.
To run it, type in
name John Jacob Jingleheimer Schmidt
and you’ll see that it outputs every word in the list. Whether it’s one argument or many, it will stop once there is no more data in the args variable.
Two forms of input
Let’s make some changes to our app. Let’s say we want to combine it so we can either put in our name as an argument, or through console input. Here’s the code:
using System;
using System.Collections.Generic;

namespace NameApp
{
	class Program
	{
		static void Main(String[] args)
		{
			string name;

			if (args.Length > 0)
			{
				name = args[0];
			}
			else
			{
				Console.WriteLine("Please Enter Your Name");
				name = Console.ReadLine();
			}

			Console.WriteLine("Hello {0} nice to meet you!", name);
		}
	}
}
Here I’m introducing some new stuff, here’s the basic flow of the program
- Run the program with or without an argument
- If an argument is entered, populate into a string
- If no argument is entered, ask for name via console input
- Output the string with the name included
Pretty simple stuff right? But we had to add a few things to accomplish that.
Create a variable for our name
string name;
We create a string variable called name, but we don’t put anything in it yet.
Side Note: if we try to use this variable before putting anything in it, the compiler will spit back an error. It’s ok to create a variable with nothing in it as long as you populate it later.
Check for arguments
if (args.Length > 0){
In this line we use an if statement that checks the length of the args variable to see if there is anything in it. If there were no arguments entered this number will be zero, so we’re saying “if the number of arguments is more than zero do this stuff”.
Everything that’s in the following braces will be executed if that statement is true, starting with { and ending with }.
If we have an argument, store it
name = args[0];
Then the program exits this code block and continues.
If we dont have an argument..
}else {
	Console.WriteLine("Please Enter Your Name");
	name = Console.ReadLine();
}
If there are no arguments (args.Length is zero) then everything within these curly braces (code block) will be executed.
Within these braces we write some output to ask your name, then in the next line we use the ReadLine() method to populate name, and then break out of the code block.
So as you noticed we created the name variable and gave two pathways to populating it. At this point in the code we know the variable is populated through one of these methods, so we output it:
Console.WriteLine("Hello {0} nice to meet you!", name);
After this, we break out of the loop and exit the Main() method and exit the program. Remember that error we got earlier? That was because we put in no arguments so we ended up trying to use a variable that wasn’t populated with data. With the program we just wrote we corrected that problem by making sure the variables would contain data before we used them.
This is the kind of thinking you have to start getting used to because C# is a statically typed program, meaning you have to define all your types before the program will compile and if you try to use variables with no data in them the program will break. This is different from dynamically typed languages such as JavaScript or PHP.
*Note: My opinion on static typing in C#: I love it. It may seem rigid and harsh to make you declare all your variables as a type and ensure they are populated for it to work properly, but it makes debugging much easier down the road. I don’t like loose typing because that “free for all” can lead to some really bad code, and just because it works doesn’t mean the job is done. You’ll spend more time debugging code than writing it so anything that saves you time and makes it clearer is a good thing. I’ll get off my soap box now.
Summary
Ok so this was a long one, but at least we got to sling some code. We went over the two ways to compile and run your program, looked at our hello world app a little closer and we worked with some input at the command line. I hope this is helping you build a better understanding of how programming in C# works. We still have a long ways to go but I think at this point you should be comfortable with modifying the code and playing around a little.
In the next chapter we’re going to cover some more basic coding stuff and dig in a little deeper. I hope you’ll check it out and give some feedback on these tutorials. I am relying heavy on this feedback because I want this to be as helpful as possible for years to come. Feel free to reach out and let me know how I’m doing.
Can you beat my SkillIQ Score in C#??
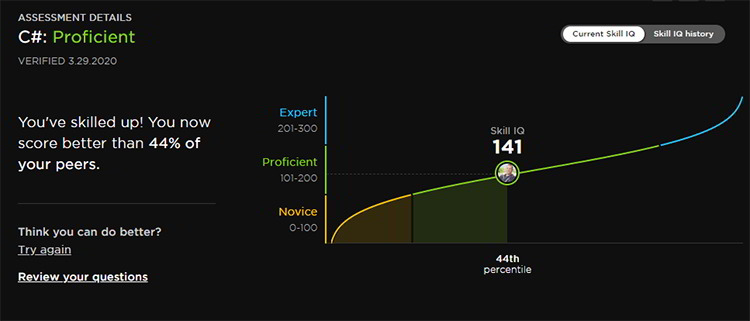
I think you can! Take the C# test here to see where you stand!

Skip the hype. The newsletter that keeps you in the know.
AI news curated for engineers. The AI New Hotness Newsletter is what you need.
Zero fluff. Just the research, tools, and infra updates that actually affect your production stack.
Stay up to date on AI for developers - Subscribe on LinkedIn