What's the Best Way to Optimize Images for the Web?
Last Update: Jun 7, 2024
I wrote a book! Check out A Quick Guide to Coding with AI.
Become a super programmer!
Learn how to use Generative AI coding tools as a force multiplier for your career.
Want fast loading web pages?
You probably aren’t optimizing your images enough. Image optimization is frequently overlooked because it’s only a small difference and takes some time to do. But a series of small changes will lead to a screaming fast website. It’s worth it. Your pages will load faster.
Why does this matter?
- It’s better for your user
- It makes your page more accessible in low bandwidth situations
- It’s better for SEO
All this in exchange for a few minutes of your time. Do you need any more reasons to optimize your images?
What We’ll Do
In this article, I will show you four ways to optimize your images and the results from each of them. I’ll explain how I tested them and show you the results.
You can download the files and perform your own tests by downloading this repo. Feel free to play around with it.
For testing, I decided to grab random images from unsplash. I randomized the width and height to get various dimensions you might see on the web.
I used this script to pull down 32 images and put them into a folder.
We’re going to look at:
- The raw files - with nothing done to them
- Photoshop optimizing
- RIOT optimizing
- XNConvert JPEG optimizing
- XNConvert to Webp optimizing
And we’ll see how these methods stack up. We will examine file size and page load time. As a note, I do not change the resolution or color depth of these images, so they are all the same except for the optimizations.
How I’m Testing Load time
I’m testing load time by creating a simple index.html file in each folder that loads up a table of the images. I am serving it up with the NPM serve package because it’s a simple HTML server that runs locally. I don’t want network latency to affect the results.
Then I use CURL to grab the load time:
curl -s -o /dev/null -w "%{time_total}\n" -H "Pragma: no-cache" https://localhost:3000
Let’s optimize some images and see the results.
Raw Images
This is a test with the images straight from Unsplash. It is our baseline measurement.
Here is the total file size for all images:

So we’re starting with 3.1MB of images. Not too shabby, but not small either.
Here is the page load time:
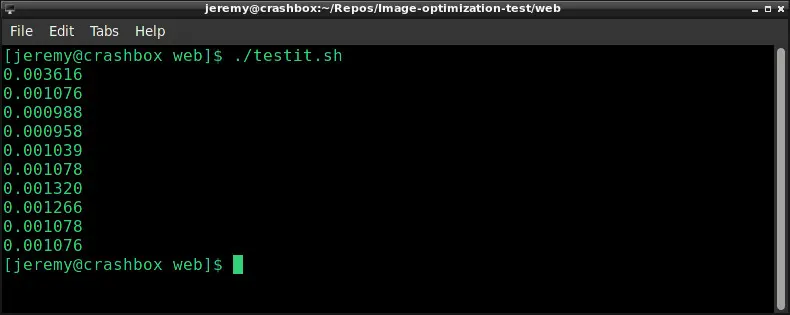
I ran the test ten times and got an average load time of 0.0013495 seconds. It seems fast, but we can improve on it.
Optimized with Photoshop
For the next set of images, I optimized these with Photoshop. I used the following settings:
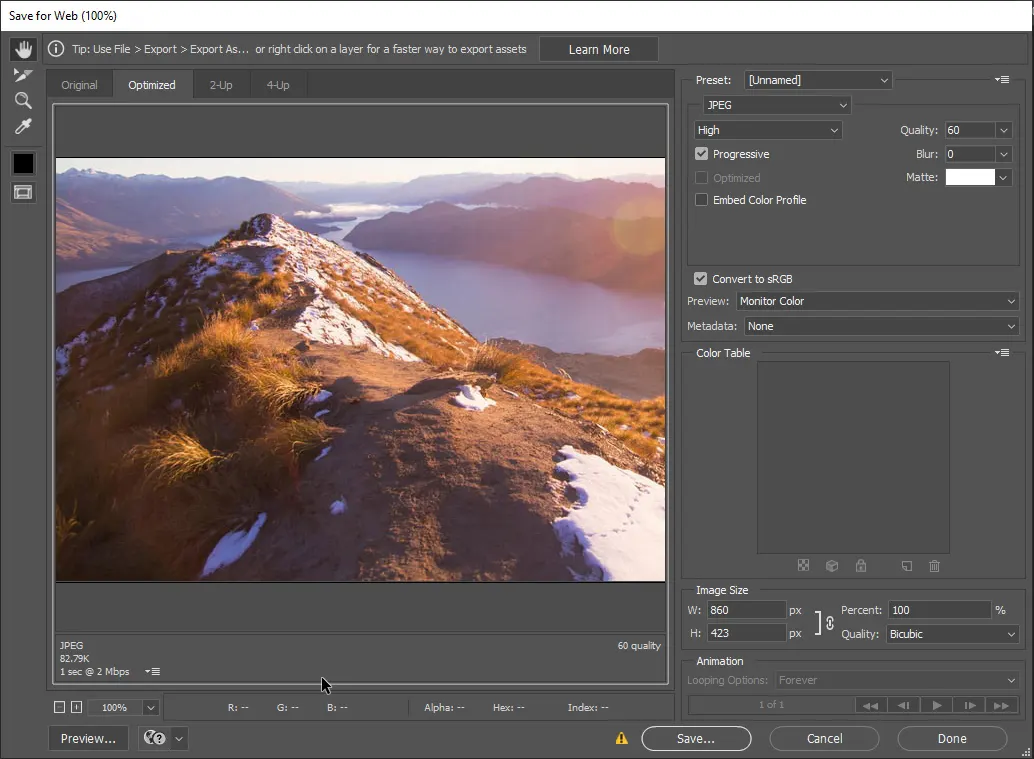
I set a quality of 60 and set it to progressive with no metadata. I got some interesting results.
Here is the total file size for all images:

It’s 3.3MB, which is more than we started with. I have no idea why this is and will investigate and update later. But most of the time, this creates smaller images.
Here is the page load time:
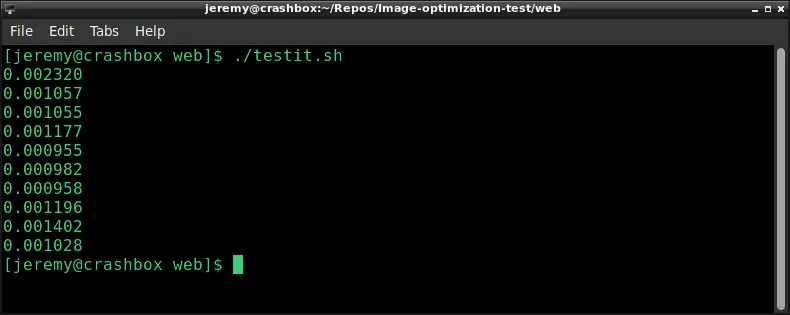
Our average load time is 0.001213 seconds, which is a little above the raw files. Not much of a surprise with this file size.
Optimized with RIOT
Next, I optimized the images with the Radical Image Optimization Tool (RIOT). This is only available in Windows, but it’s an excellent tool I’ve been using for years.
I used the following settings:
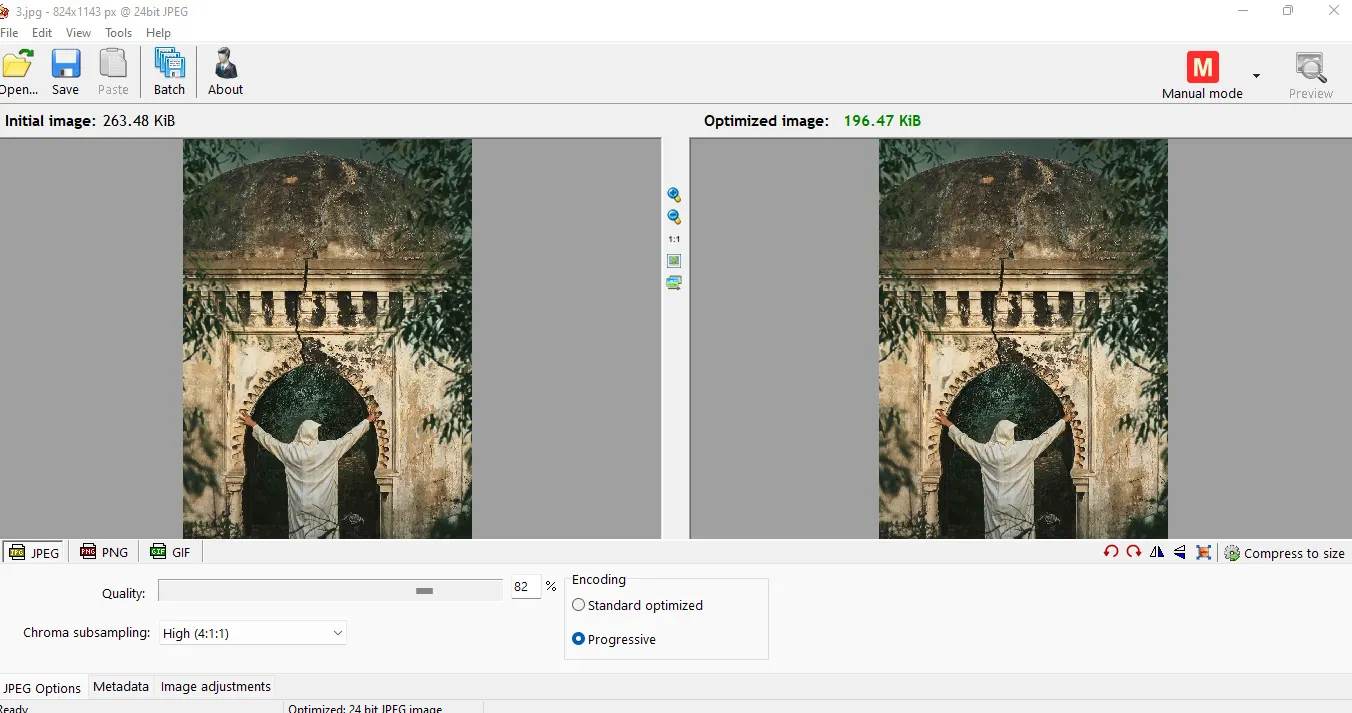
And even though I left the quality pretty high at 82%, it shrunk the files down considerably:
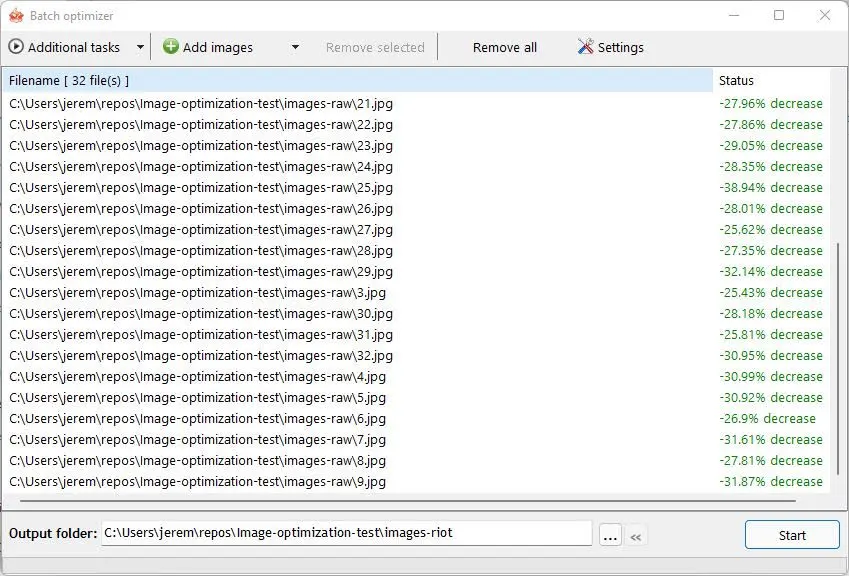
Here is the total file size for all images:

At 2.3MB, that’s quite a bit of savings. This reduces your website’s footprint without sacrificing quality.
Here is the page load time:
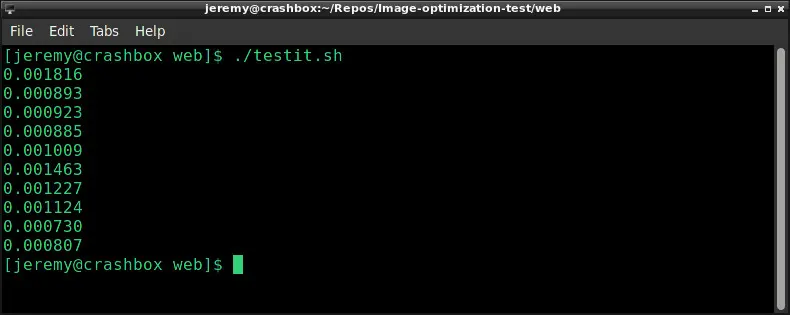
Our average load time is 0.0010877 seconds, which is our fastest yet.
Optimized with XNConvert (JPG)
For this test, I optimized the images with XNConvert and used it to optimize the JPEGs. This is the tool I use the most because it runs in Windows, Mac, or Linux and does batch processing quickly.
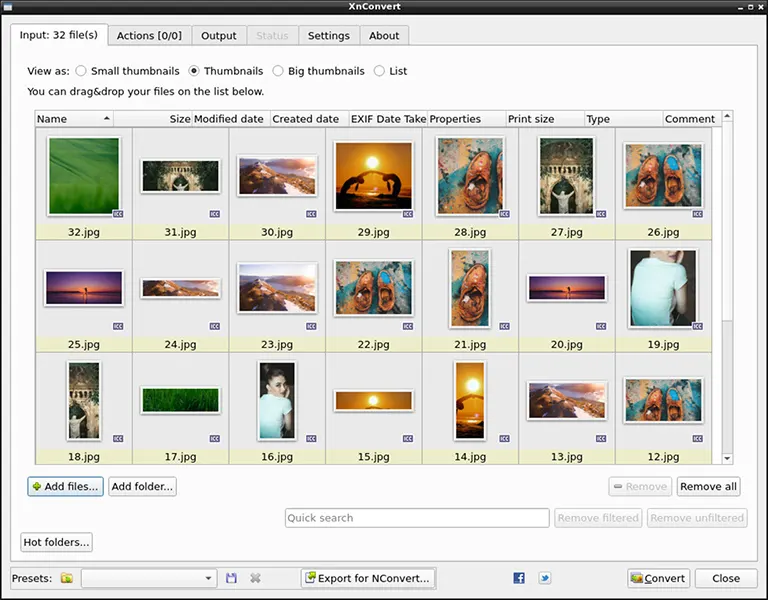
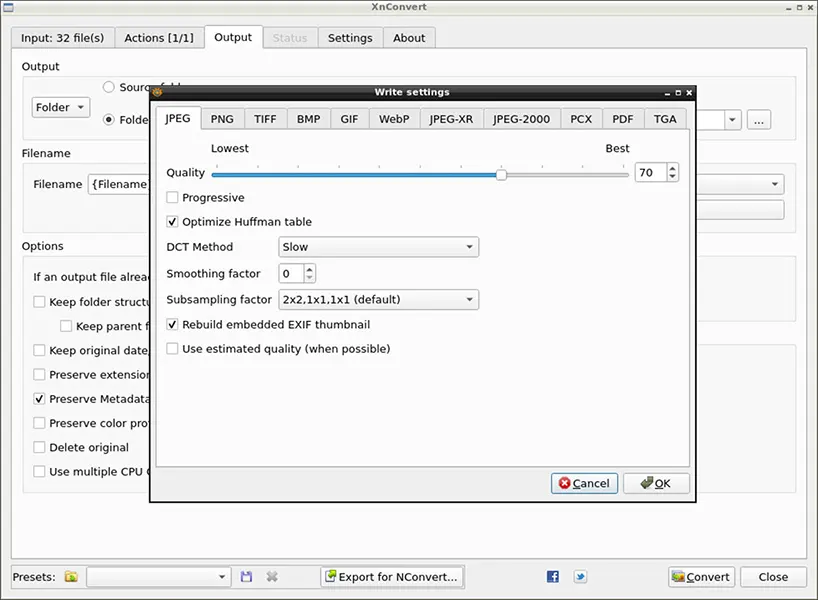
I removed the metadata:
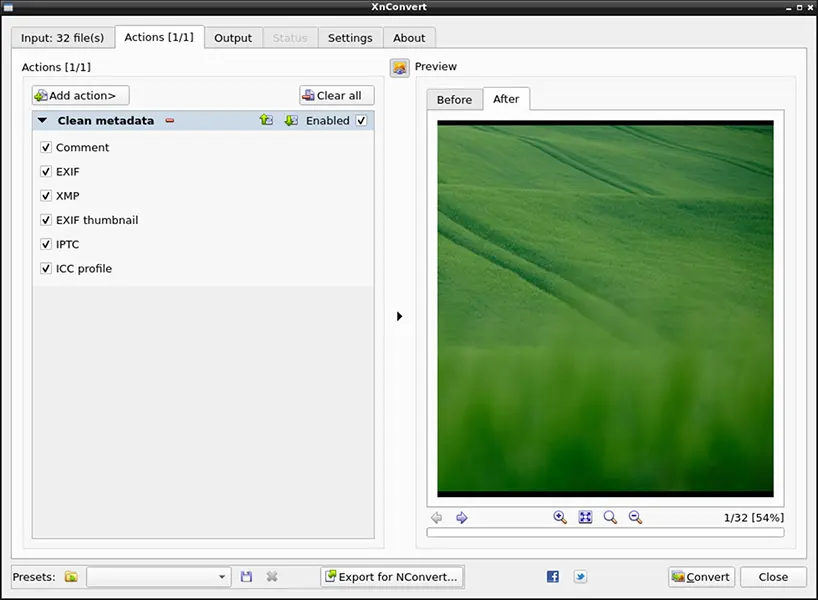
Then saved them with the following settings:
Here is the total file size for all images:

At 2.2MB, this is the smallest we’ve seen yet. However, I don’t expect it will significantly improve load time over the previous 2.3MB of images.
Here is the page load time:
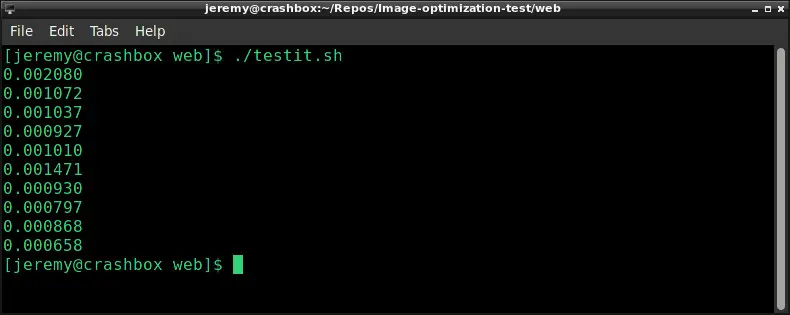
The average is 0.001085 seconds, which is a little faster than RIOT. Great!
I highly recommend XNConvert for image optimization. But, we can take this even a step further and convert everything to Webp images. These will be significantly smaller and hopefully faster.
Optimized with XNConvert (WebP)
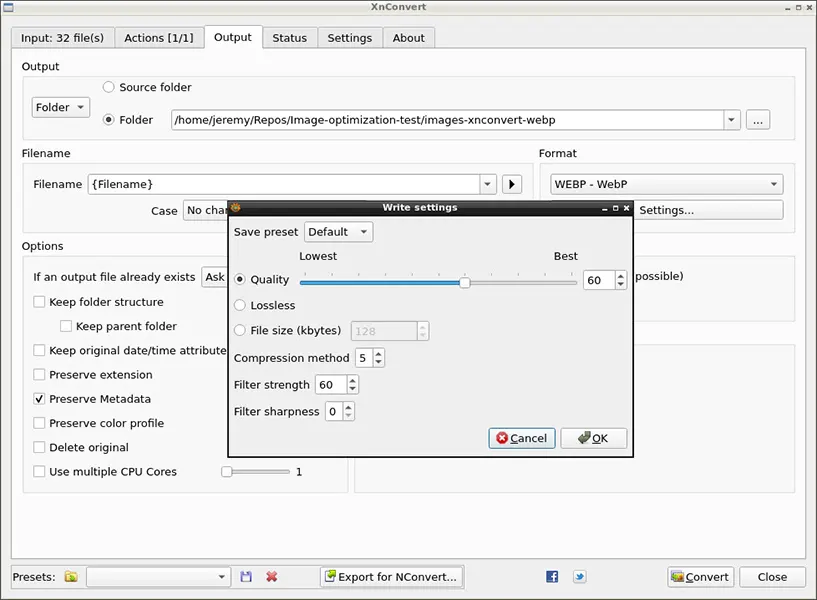
So I took the same set of raw images and converted them to .webp images. This is Google’s recommended image format these days, and it’s easy to see why.
Here are the settings I used:
Here is the total file size for all images:

Wow! We went from 3.1MB of images to 1.5MB. That’s significant. Let’s see what it does to load time.
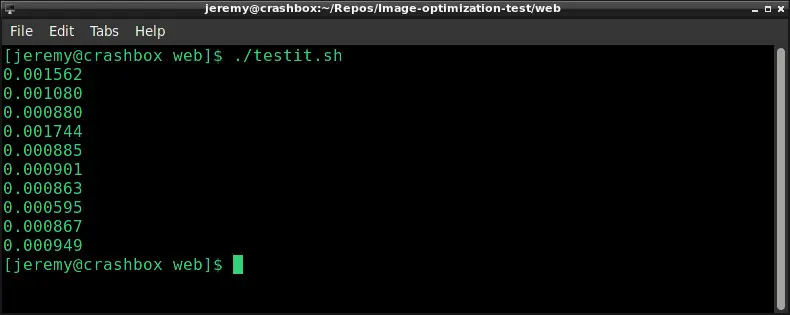
The average is 0.0010326 seconds, which is a new record. Great!
This is something you should consider when doing image optimization on your site. Webp images are the way forward.
Let’s Look at the Results!
This is the total file size for all images:
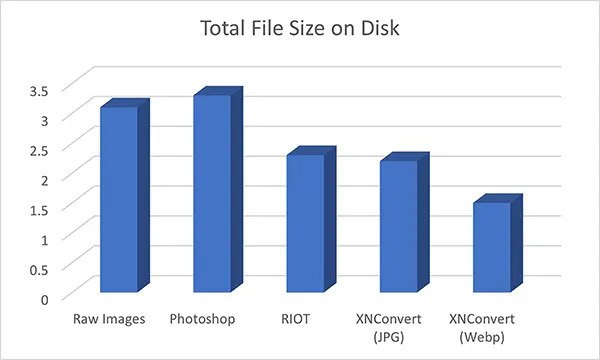
| Method | File Size | |
|---|---|---|
| Raw images | 3.1MB | |
| Photoshop | 3.3MB | |
| RIOT | 2.3MB | |
| XNConvert (JPG) | 2.2MB | |
| XNConvert (Webp) | 1.5MB |
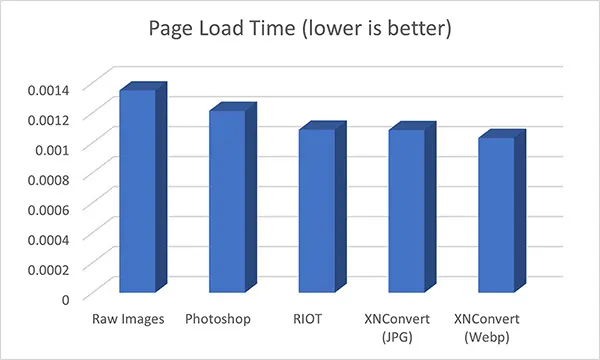
| Method | Load Time | |
|---|---|---|
| Raw images | 0.0013495 | |
| Photoshop | 0.001213 | |
| RIOT | 0.0010877 | |
| XNConvert (JPG) | 0.001085 | |
| XNConvert (Webp) | 0.0010326 |
Conclusion
Optimize your images! As you can see, it makes a difference, even with this small page with 32 images on it. I will do this experiment again with a larger image set to see how the changes scale.
Overall it’s pretty clear that .webp images are smaller and more efficient.
It’s definitely worth the few minutes of extra time.
Questions? Comments? yell at me on Twitter!
– Jeremy


