


The easiest way to run an LLM in Windows

Last Update: Jun 7, 2024

AI changed software development. This is how the pros use it.
Written for working developers, Coding with AI goes beyond hype to show how AI fits into real production workflows. Learn how to integrate AI into Python projects, avoid hallucinations, refactor safely, generate tests and docs, and reclaim hours of development time—using techniques tested in real-world projects.
There’s no ignoring the constant buzz around the cool generative AI tools this last year. ChatGPT, Bard, Claude, the list goes on and on. These tools all use LLMs, or Large Language Models. If you’re curious about LLMs, you may have done some reading about them, and found people installing them on their own machine.
Here are some reasons to run your own LLM locally:
- There are no rate limits. It’s 100% free
- You can experiment with settings and tune them to your liking
- You can use different models for different purposes
- You can train your own models for different things
These are a few reasons you might want to run your own LLM. Or maybe you don’t want the whole world to see what you’re doing with the LLM. It’s risky to send confidential or IP-protected information to a cloud service. If they’re ever hacked, you might be exposed.
In this article, I will show you the absolute most straightforward way to get a LLM installed on your computer. We will use the awesome Ollama project for this. The folks working on Ollama have made it very easy to set up. You can do this even if you don’t know anything about LLMs. Even if you’re not very technical, we have the full instructions here. Many of the tools that run LLMs run in a Linux or Mac environment. But you shouldn’t be left out if you’re running Windows 11. This tutorial is for you!
So, let’s run a large language model on our local Windows 11 computer!
Install WSL
To start, Ollama doesn’t officially run on Windows. With enough hacking you could get a Python environment going and figure it out. But we don’t have to because we can use one of my favorite features, WSL or Windows Subsystem for Linux.
If you need to install WSL, here’s how you do it.
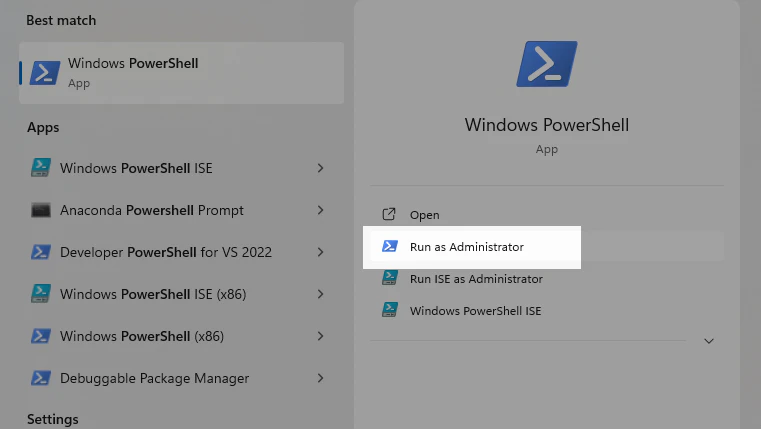
Open Powershell as an administrator:
Type in “Powershell” in the search bar. Make sure to click on “Run as Administrator”.
Then, when the console opens up, type this:
wsl --install
This will install WSL on your machine. This will allow you to run several different flavors of Linux from within Windows. It’s not emulated Linux, but the real thing. And the performance is incredible. You can list the different distributions of Linux that are available to install by typing in:
wsl.exe -l -o
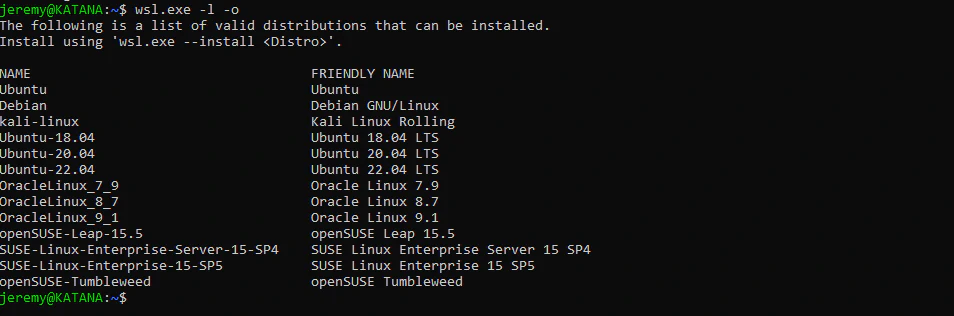
I usually run Ubuntu 22.04 because it’s very solid and runs the best for me. I’ve run Ollama on a couple of machines with this version, so here’s how to install it:
wsl.exe --install Ubuntu-20.04
It will ask for a username and password:

The username can be whatever you want. Enter that in, just as you would any system. Don’t use weak passwords! And it’s ready to go. Search for “Ubuntu” in the search bar:
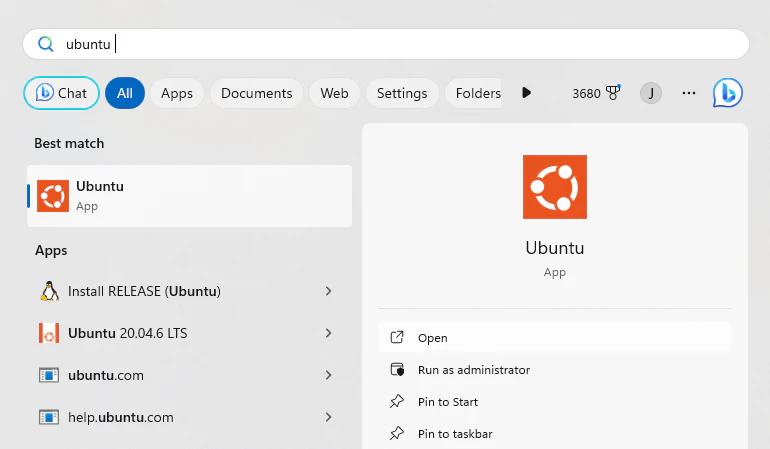
And you can run it from here. You can pin it to your taskbar, or if you’re using Windows Terminal you can run it from there.
Now you have a neat Linux system up and running. Now we’re going to install the Ollama software.
Install Ollama
Installing Ollama is easy. They’ve made an installer that works really well, especially in Linux and Mac Systems. Just type in:
curl https://ollama.ai/install.sh | sh
You should see something like this:
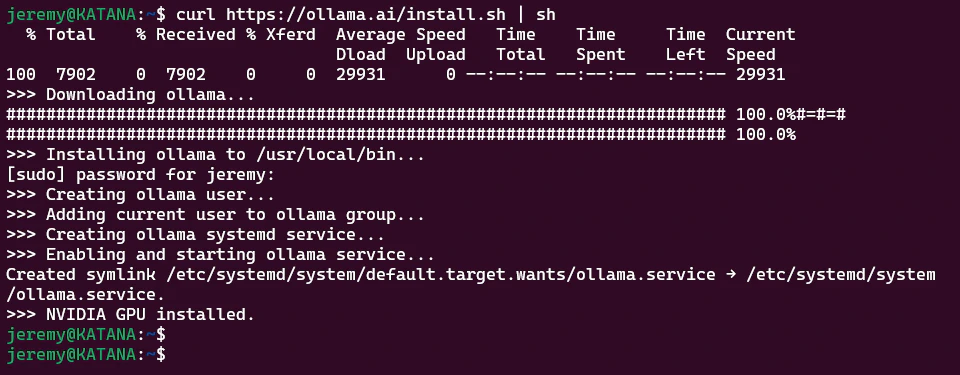
And that’s it. Really! It takes care of all your dependencies and makes it a smooth process. Now, we need a model.
Loading a model
We need a LLM (Large Language Model) to work from. This is easy, as Ollama supports a bunch of models right out of the gate. So let’s use one.
Ollama will start up in the background. If it hasn’t started, you can type in:
ollama serve
At the prompt. It should automatically start up every time you start WSL.
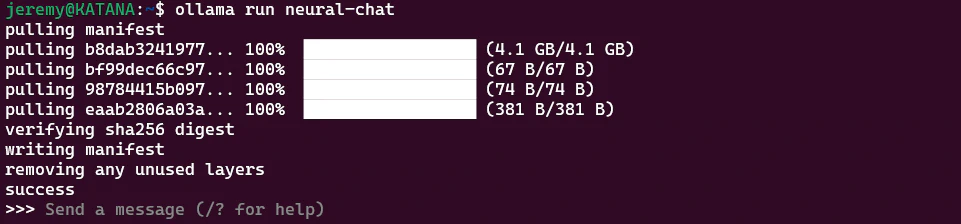
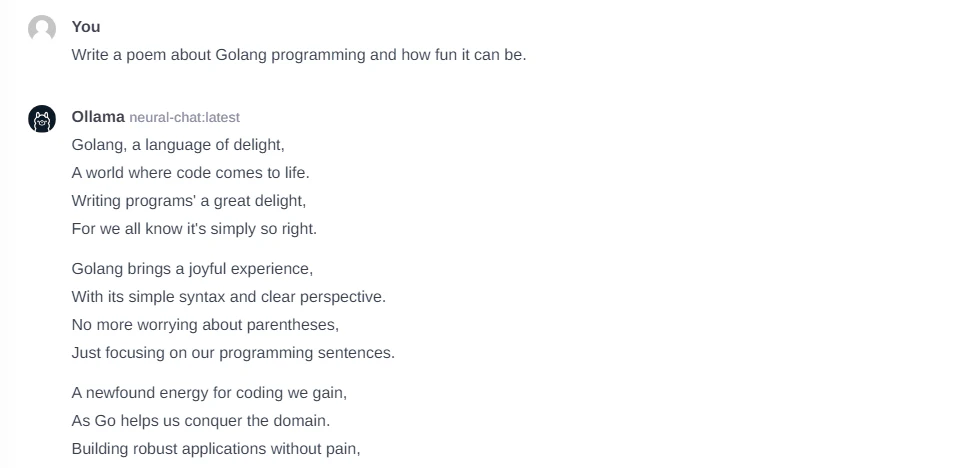
I’ve been playing around with this NeuralChat model from Intel. It’s fast, and useful. Let’s install that.
ollama run neural-chat
And after it loads (it takes a few minutes), we now have a connection!
Great! We now have a prompt available. Let’s see what we can do with it.
Interacting with the LLM
Now that we have a Large Language Model loaded up and running, we can interact with it, just like ChatGPT, Bard, etc. Except this one is running locally on our machine.
You can chat directly in the terminal window:

You can ask questions, have it generate things or chat.
Or, you can work with the API:
curl http://localhost:11434/api/generate -d '{
  "model": "neural-chat",
  "prompt":"How do I center a div?"
}'
But then you get output like this:
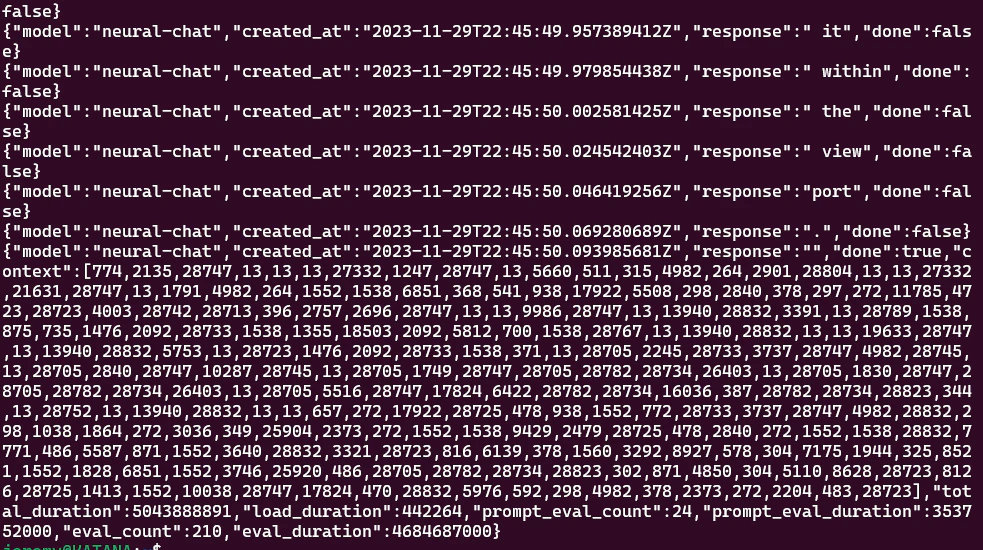
What are you going to do with that? Well, it’s not super useful in this format, but in a future article I’ll show some ways to deal with it.
The easiest way to interact is to use something like Postman to send queries:
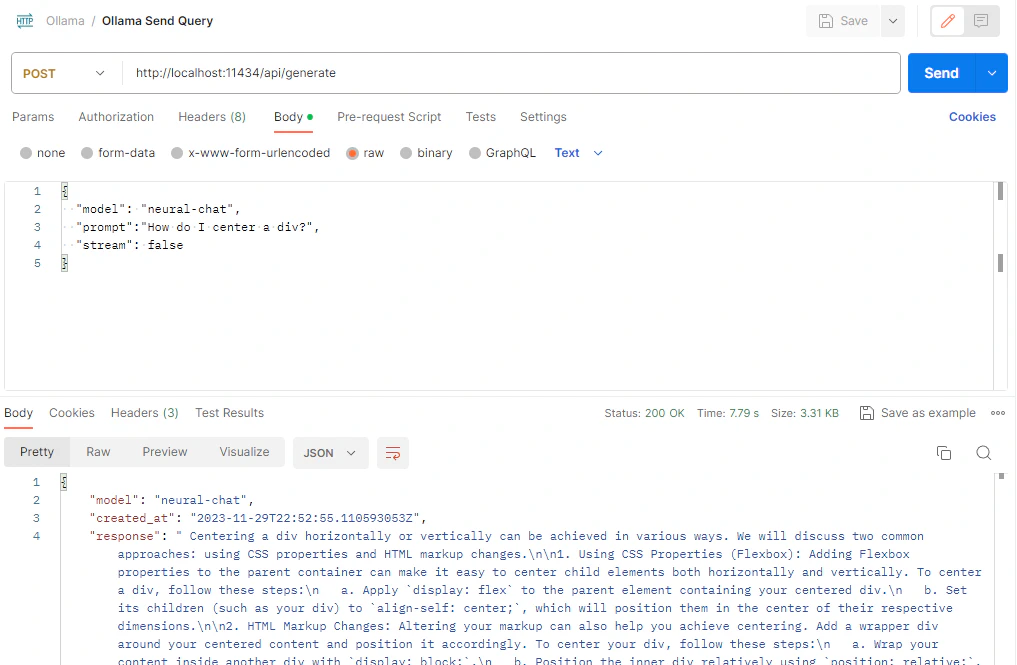
This makes it super easy. You can use the console or Postman as much as you want, because
There are no rate limits!
So now you have it up and running. It’s easy and fun to play with. But maybe you want something extra, like a chat interface, and something to keep track of your conversations. Something more like ChatGPT? Keep reading.
Web Interface
If you’d like a web interface for Ollama, that’s pretty easy too. Thanks to the folks who put together ollama-webui, it’s pretty easy.
First, you’ll need to clone the repo. You can put it anywhere you like:
git clone https://github.com/ollama-webui/ollama-webui.git && cd ollama-webui/
Then, we’ll use NPM to install it.
npm install
This will only take a few minutes. Next, we need to modify Ollama. In the terminal, create this folder:
sudo mkdir -p /etc/systemd/system/ollama.service.d
We can run these commands to create a text file configuration for Ollama. This will make sure the application can expose the API to this web interface:
echo '[Service]' >>/etc/systemd/system/ollama.service.d/environment.conf
echo 'Environment="OLLAMA_HOST=0.0.0.0:11434"' >>/etc/systemd/system/ollama.service.d/environment.conf
Or if you’d rather just edit the file, just open
/etc/systemd/system/ollama.service.d/environment.conf
And add this:
[Service]
Environment="OLLAMA_HOST=0.0.0.0:11434"
And save the file.
Now we need to reload systemd and restart Ollama:
systemctl daemon-reload
systemctl restart ollama
Next, we’ll start Ollama with whatever model you choose. I am using neural-chat again:
ollama run neural-chat
Now open a 2nd terminal (with the same Ubuntu installation) and start up the web server:
cd ollama-webui
npm run dev
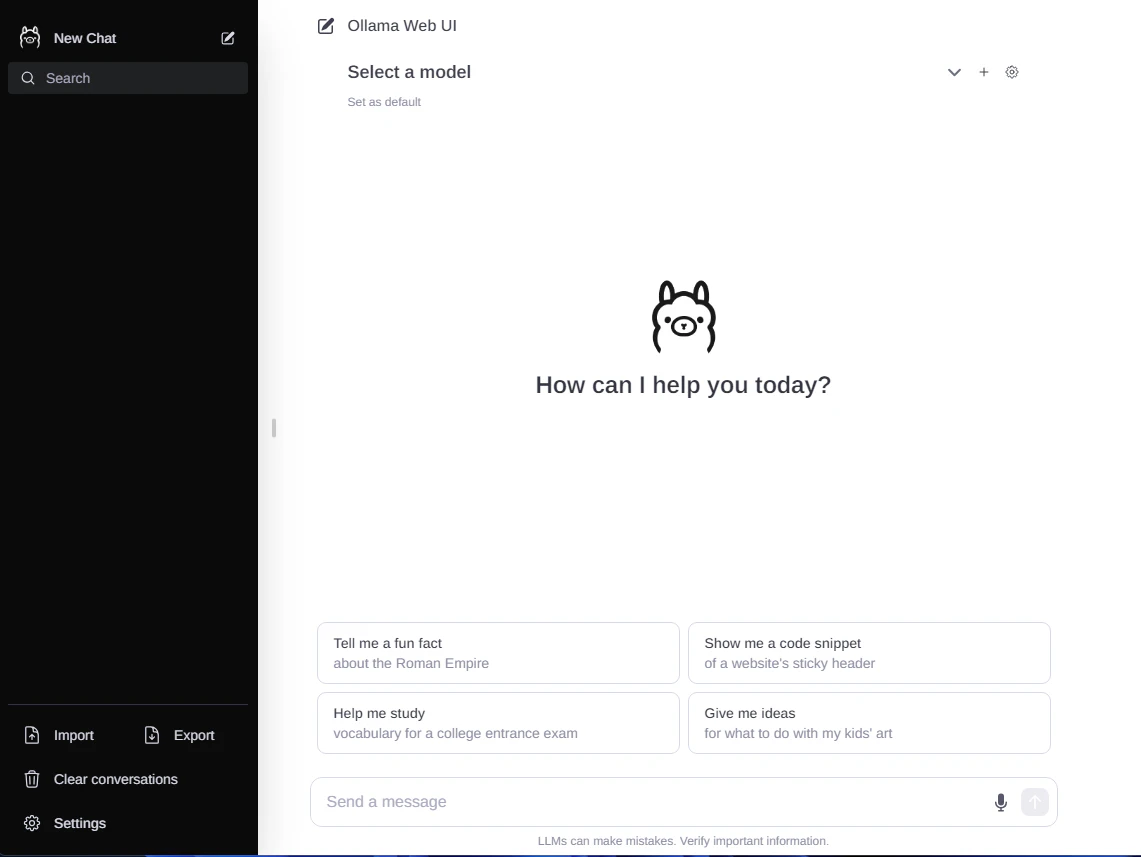
It will start up, and you’ll see a familiar interface:
Awesome! Now click on settings and make sure your Ollama URL is entered just like this:
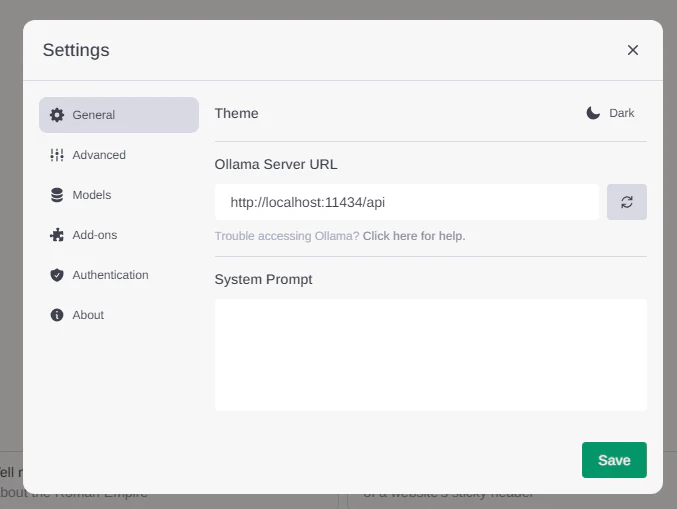
And you’re ready to go!!
This is a great way to run your own LLM on your computer. There are plenty of ways to tweak this and optimize it, and we’ll cover it on this blog soon. So stay tuned!
Conclusion
So that’s it! If you want to run LLMs on your Windows 11 machine, you can do it easily thanks to the Ollama team. It’s easy and configurable. We will jump into this project much more in future articles. Until then, enjoy tinkering, and feel free to reach out if you need anything!
Also be sure to join the AI Wizards Community to see more cool generative AI stuff, or share your work.
– Jeremy

Skip the hype. The newsletter that keeps you in the know.
AI news curated for engineers. The AI New Hotness Newsletter is what you need.
Zero fluff. Just the research, tools, and infra updates that actually affect your production stack.
Stay up to date on AI for developers - Subscribe on LinkedIn